CHAPTER 06
Site receipt, storage and erection
Receive trucks and parts, organise their storage and track their erection on site.
Before you start. The project must contain the relevant assemblies and include the construction site in its logistics route. People working on site must have permissions appropriate to their roles.
Give the site team access to the project
Invite a user and define which companies' information they can view or update.
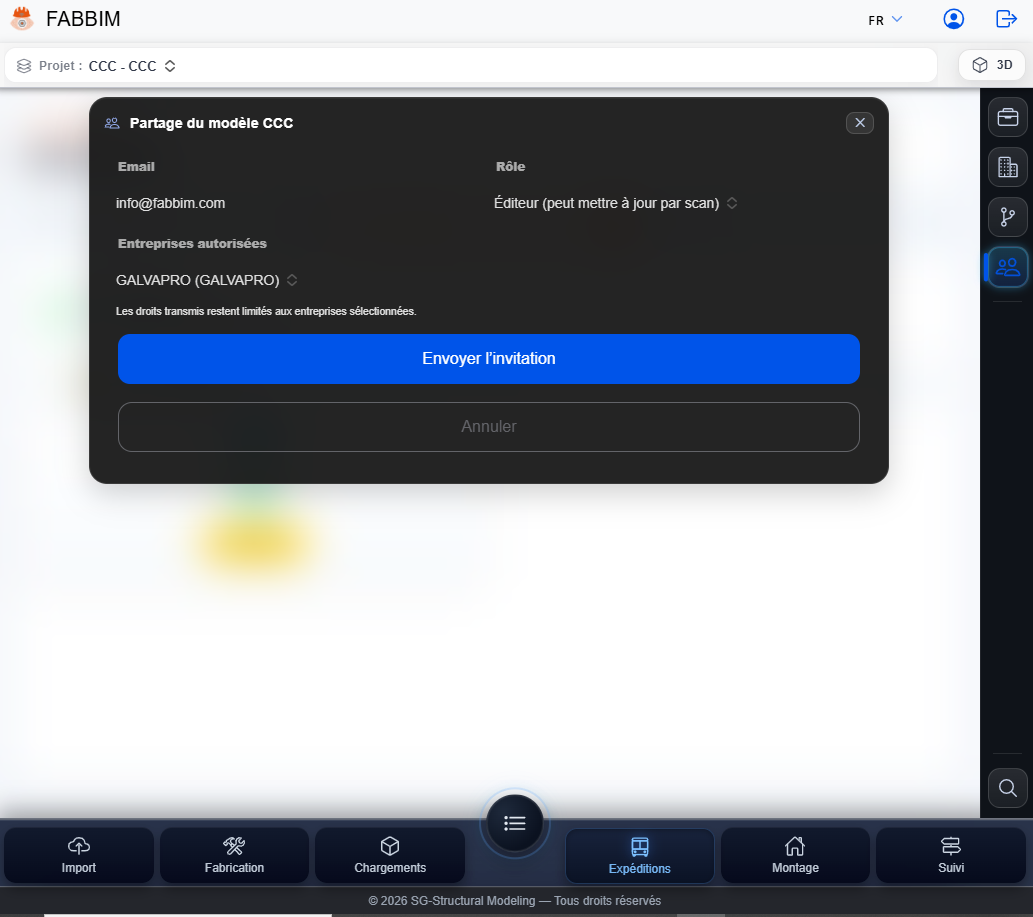
- In the project, open Model sharing, then the invitation form.
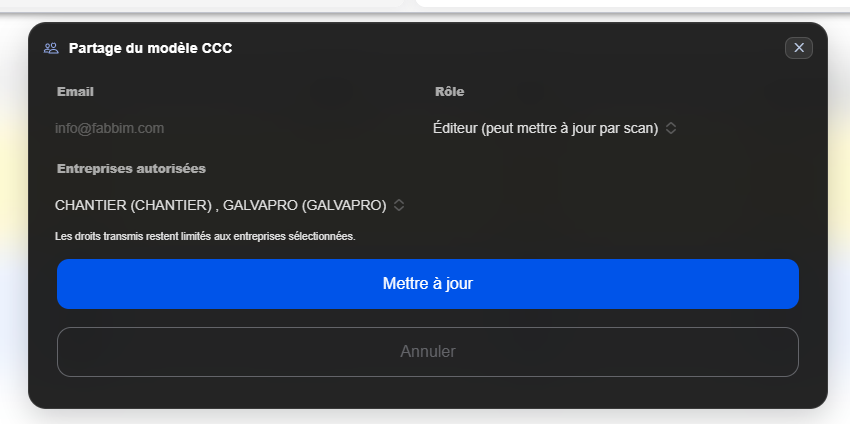
- Enter theemail address and select the role Editor (can update by scanning) if the person needs to update tracking information.
- In Authorised companies, select SITE and, where necessary, the other company on the route, such as GALVAPRO.
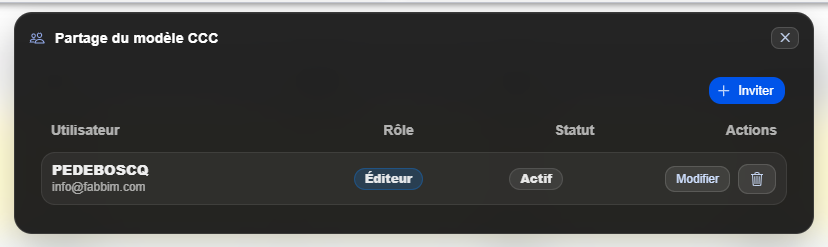
- Use Send invitation or Update depending on whether you are adding a user or changing their access. Then check the user list and statuses.
Confirm truck receipt on site
When the truck arrives, check its contents and record its receipt in Fabbim.
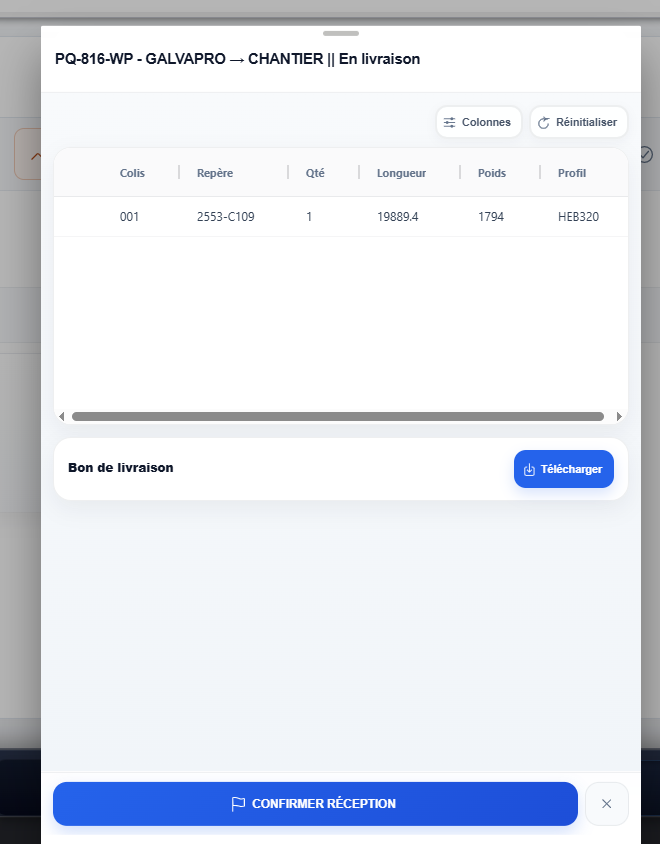
- Open the section Dispatches and the truck shown as In transit to the site.
- Check transport information, the package, marks and quantities in the truck details.
- You can use Download in the section Delivery note to download the PDF.
- Click Confirm receipt once the truck has actually been received.
Find delivered trucks
Received trucks remain available in the logistics section.
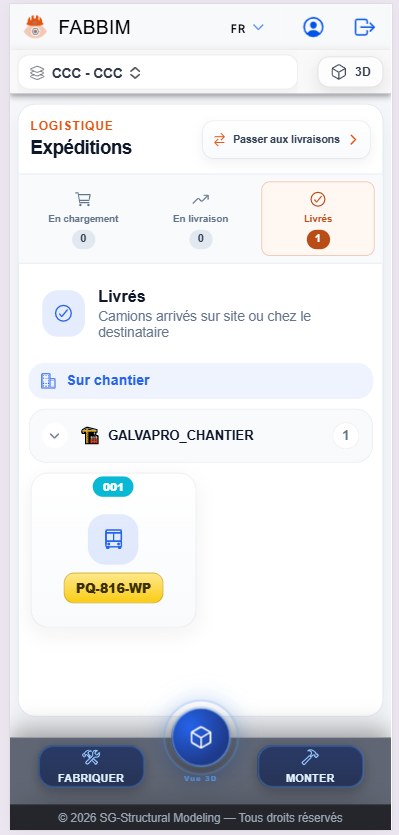
- In Dispatches, select the tab Delivered.
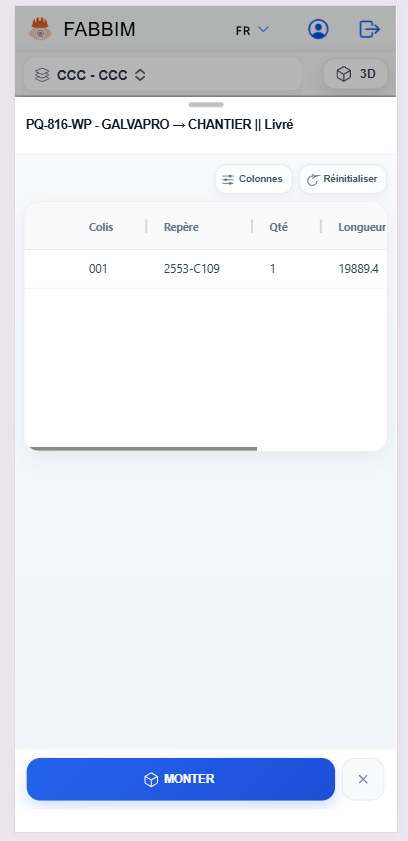
- Find the truck under the destination On site and open its details.
- Check the list of delivered elements. The details also provide the action Erect to continue site tracking.
Open the site erection table
The Erection module brings together the assemblies to process on site.
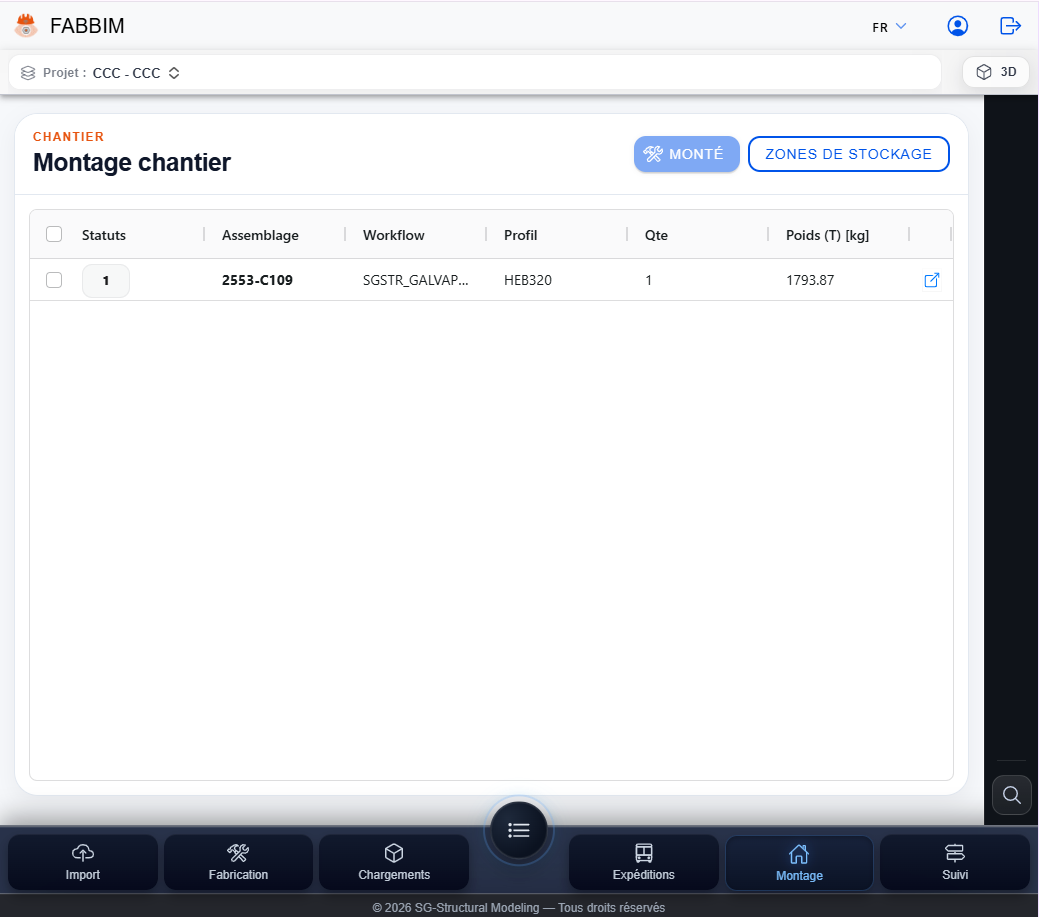
- Click the section Erection in Fabbim's bottom navigation.
- View the project's assembly list: mark, workflow, section, quantity and weight.
- Find the controls Erected and Storage areas above the table.
Select assemblies to unload
Select the received parts before assigning them a location on site.
- In the erection table, select the row for the assembly to unload.
- Check the mark and quantity of the selection.
- Click Unload (1) in the example shown: the number corresponds to the displayed selection.
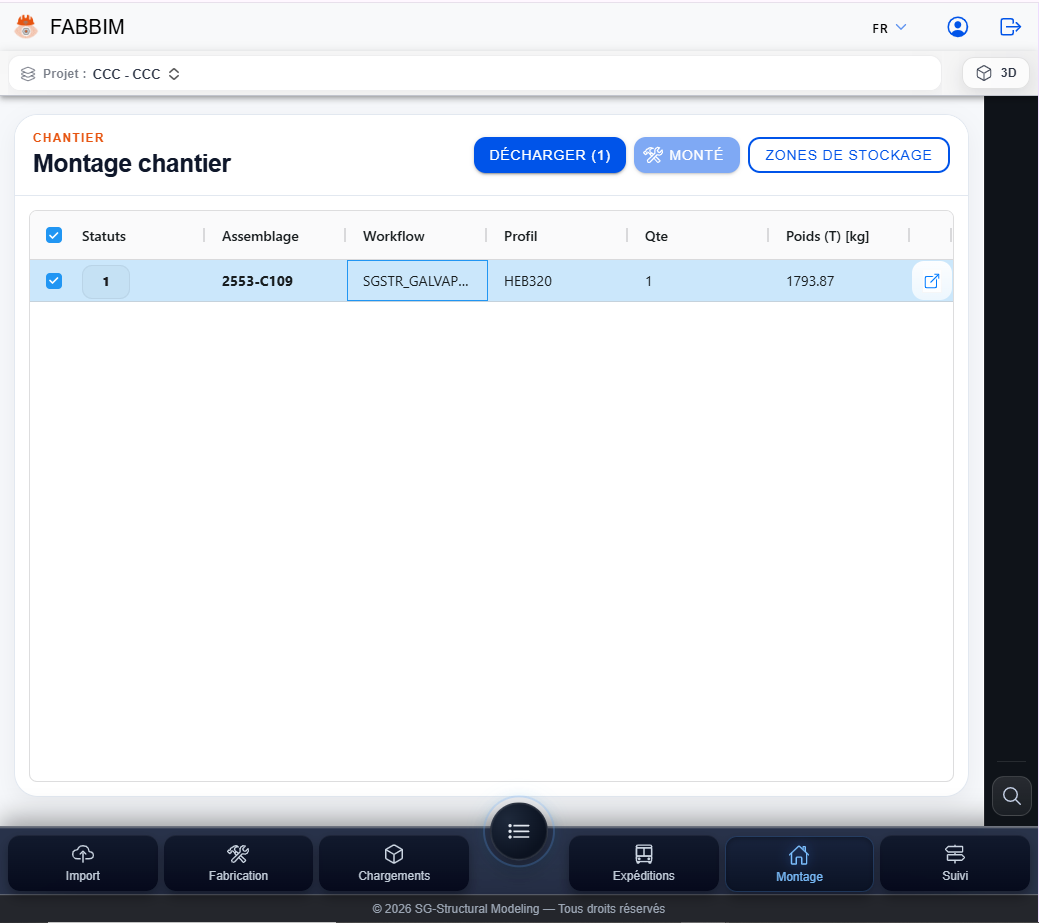
Choose a storage area for unloading
Assign parts to their actual location so they can be found during erection.
- In the window Unload, choose the site receiving the parts.
- Select an area from the list Available areas if the required area already exists.
- If the location does not exist yet, click + New area to create it.
- After choosing the area, use Confirm to record the operation.
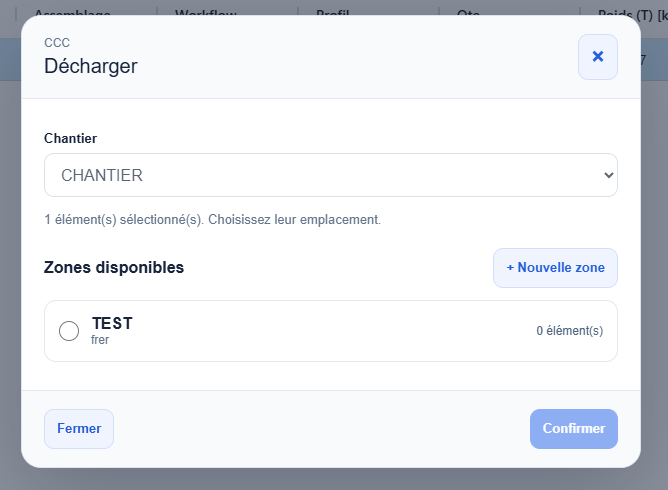
Create a new storage area
Name site locations to make parts easier to find.
- Click + New area from the unloading window.
- Check the site, then enter the area name, for example BUFFER AREA.
- You can add an optional description to specify its location, for example an area reference or chainage marker.
- Click Save, then select the created area to complete unloading if needed.
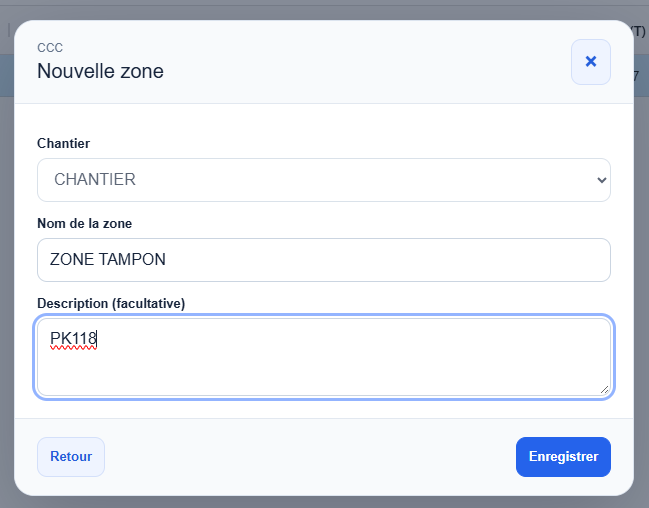
Check stored parts and parts awaiting erection
Site tracking displays the assigned area and part status after unloading.
- Return to the tracking list for Site erection.
- Check the column Storage area : the example shows BUFFER AREA.
- Check thestatus of the element, shown as To erect until erection has been confirmed.
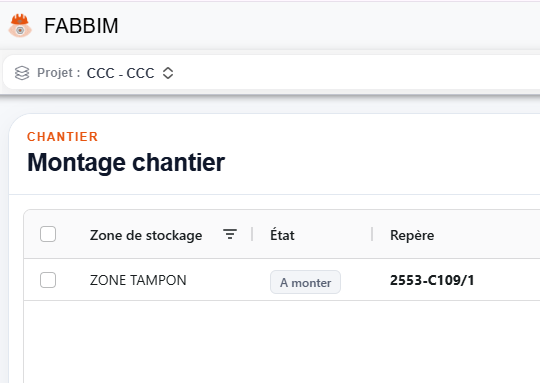
Update the status after erection
Once the assembly has actually been installed, its progress can be recorded as Erected in Fabbim.
- After the assembly has actually been installed, use the action Erected available in the module.
- Check the relevant mark in the tracking list.
- Check that thestatus has changed to ✓ Erected ; in the example, the storage area remains visible.
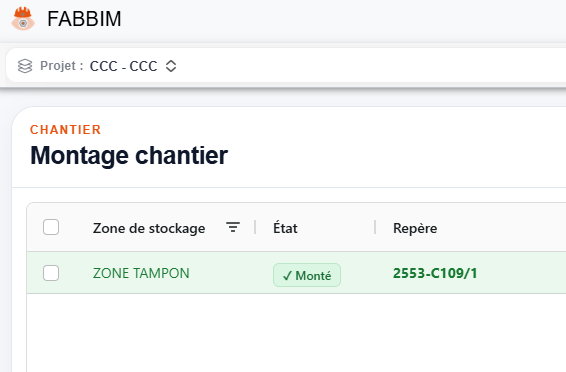
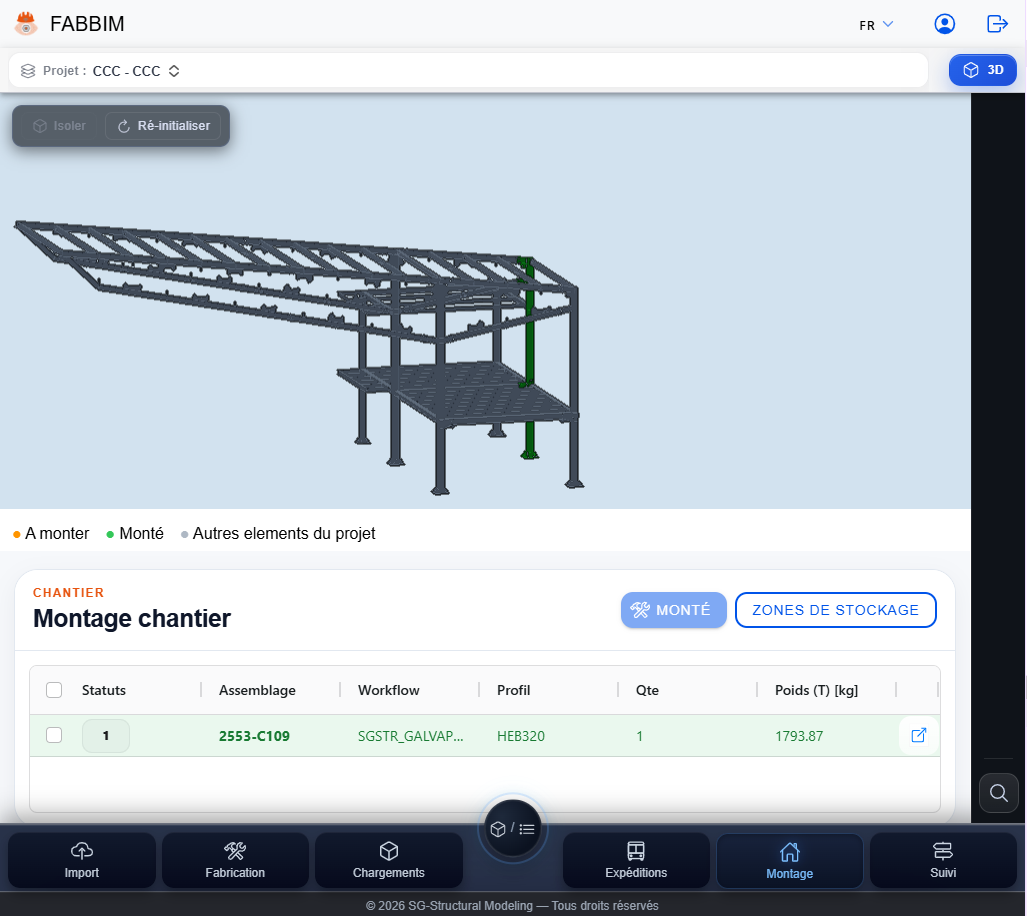
View erection progress in the 3D BIM model
Visually check assemblies already erected and those still to install.
- Activate the 3D view from the Erection module.
- Check the legend To erect, Erected and Other project elements.
- In the example, the assembly whose erection has been recorded appears in green in both the model and the table.