CHAPTER 07
Overall tracking, BIM tools and project management
Read indicators, explore assemblies, prepare materials and configure companies and workflows.
Before you start. Select the project and, where needed, the relevant package. Available commands depend on your role and rights. The screenshots illustrate several Fabbim modules: Tracking, Import, and company and workflow management.
View overall fabrication and delivery tracking
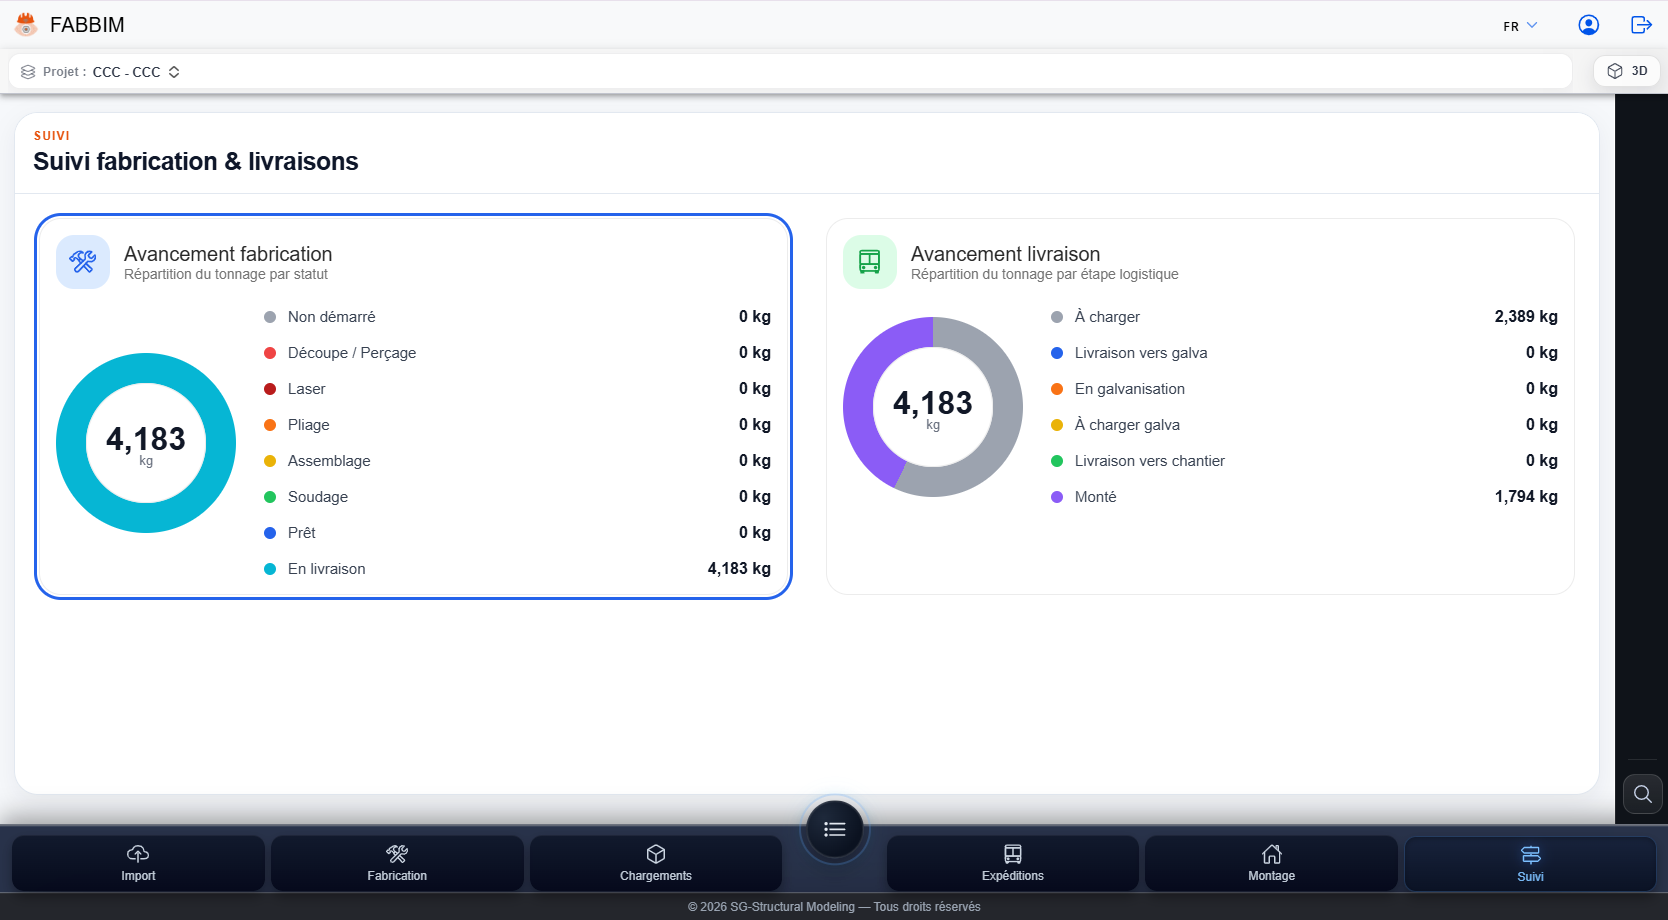
Two charts summarise project tonnage by workshop progress and logistics stage.
- Open the section Tracking for the selected project.
- View the chart Fabrication progress, which breaks down tonnage by production status.
- View the chart Delivery progress, which shows tonnage distribution by logistics stage.
- Read the values in kg and the total shown at the centre of each chart to compare the two views.
Display indicators alongside the 3D BIM model
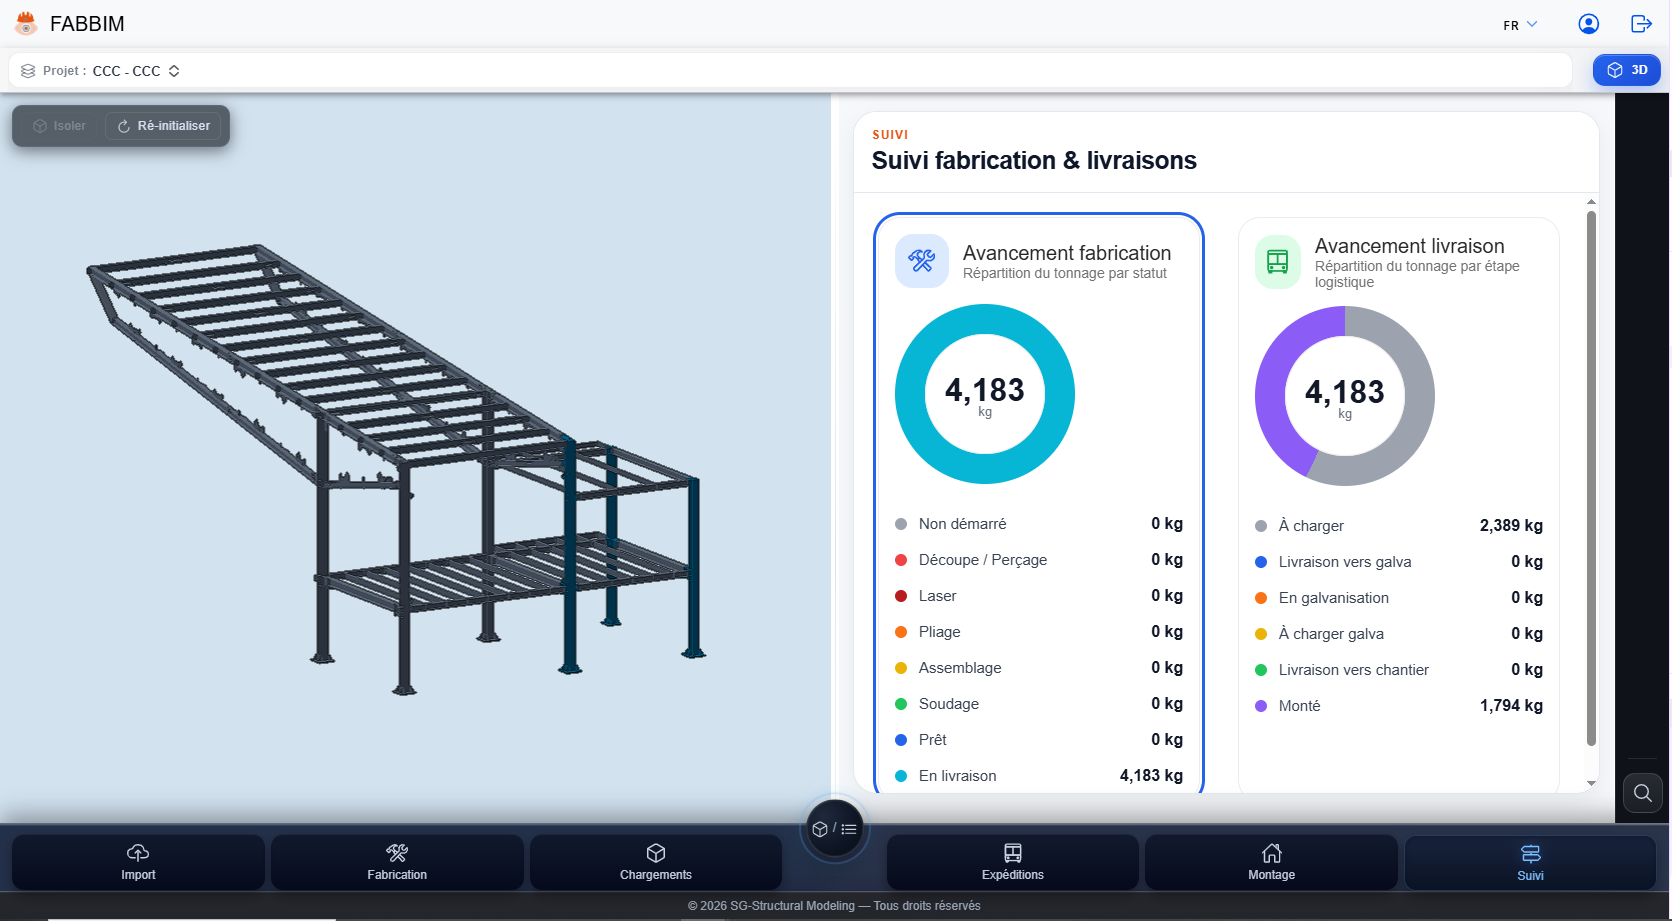
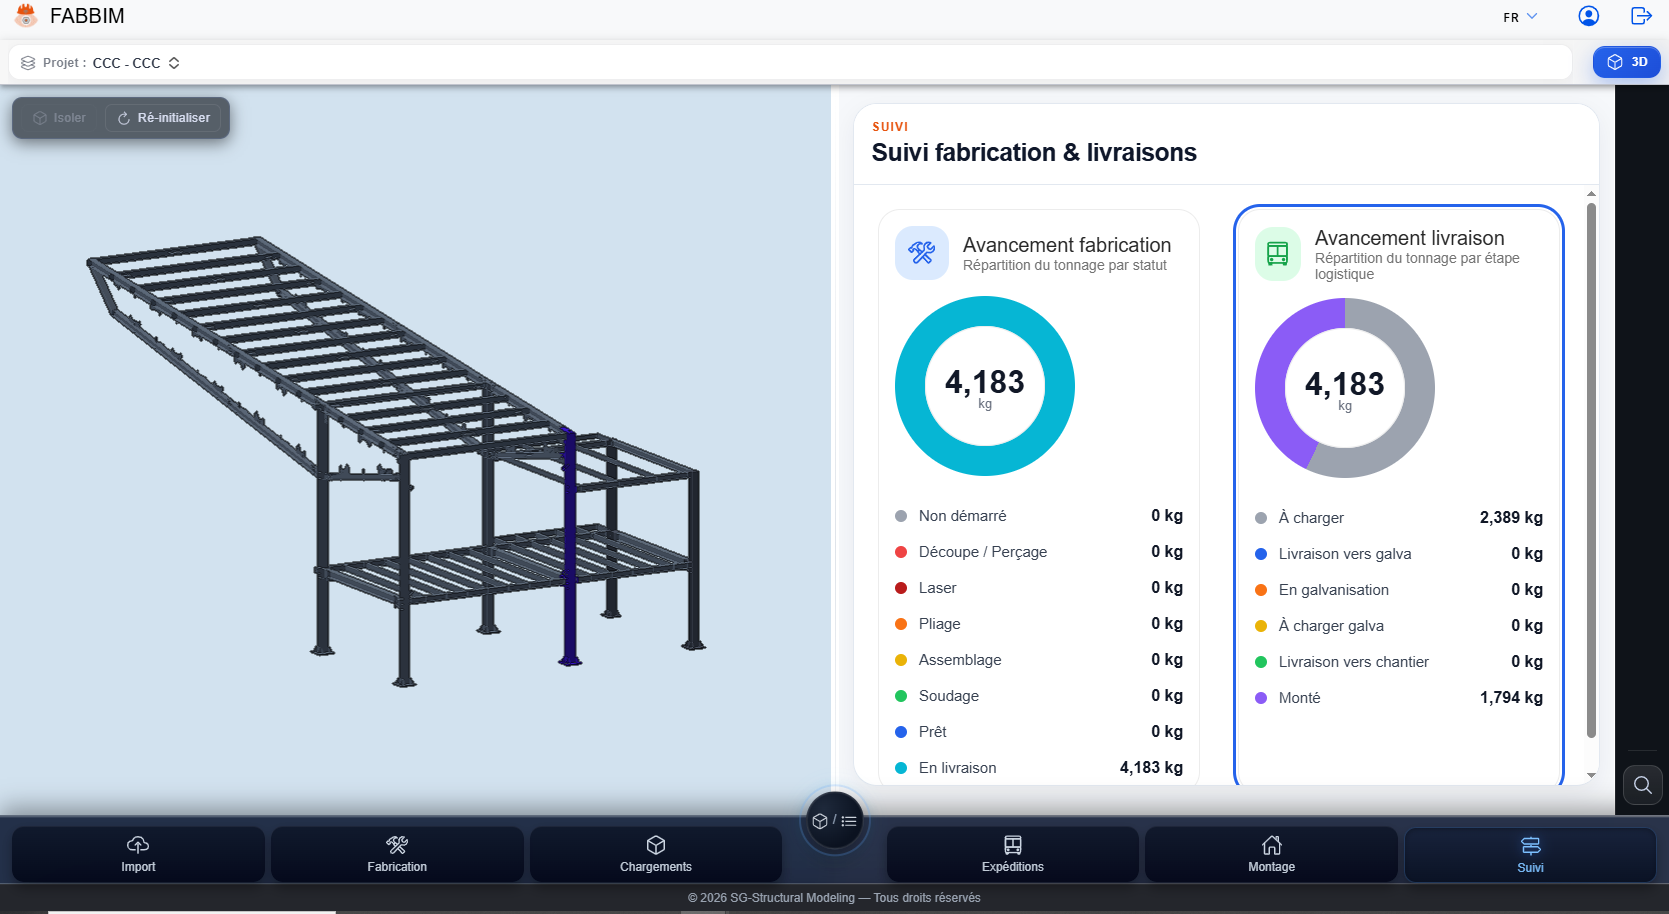
Combine tracking indicators with the 3D representation of project assemblies.
- Activate the view 3D then choose a layout that keeps tracking visible.
- View the structure in the model and the two tracking charts in the adjacent panel.
- Select the indicator Delivery progress : the screenshot shows an element highlighted in the model.
- Use the model to visually locate elements associated with the displayed information.
Filter and isolate assemblies in 3D
Narrow the list to a group of parts, then locate the selection in the model.
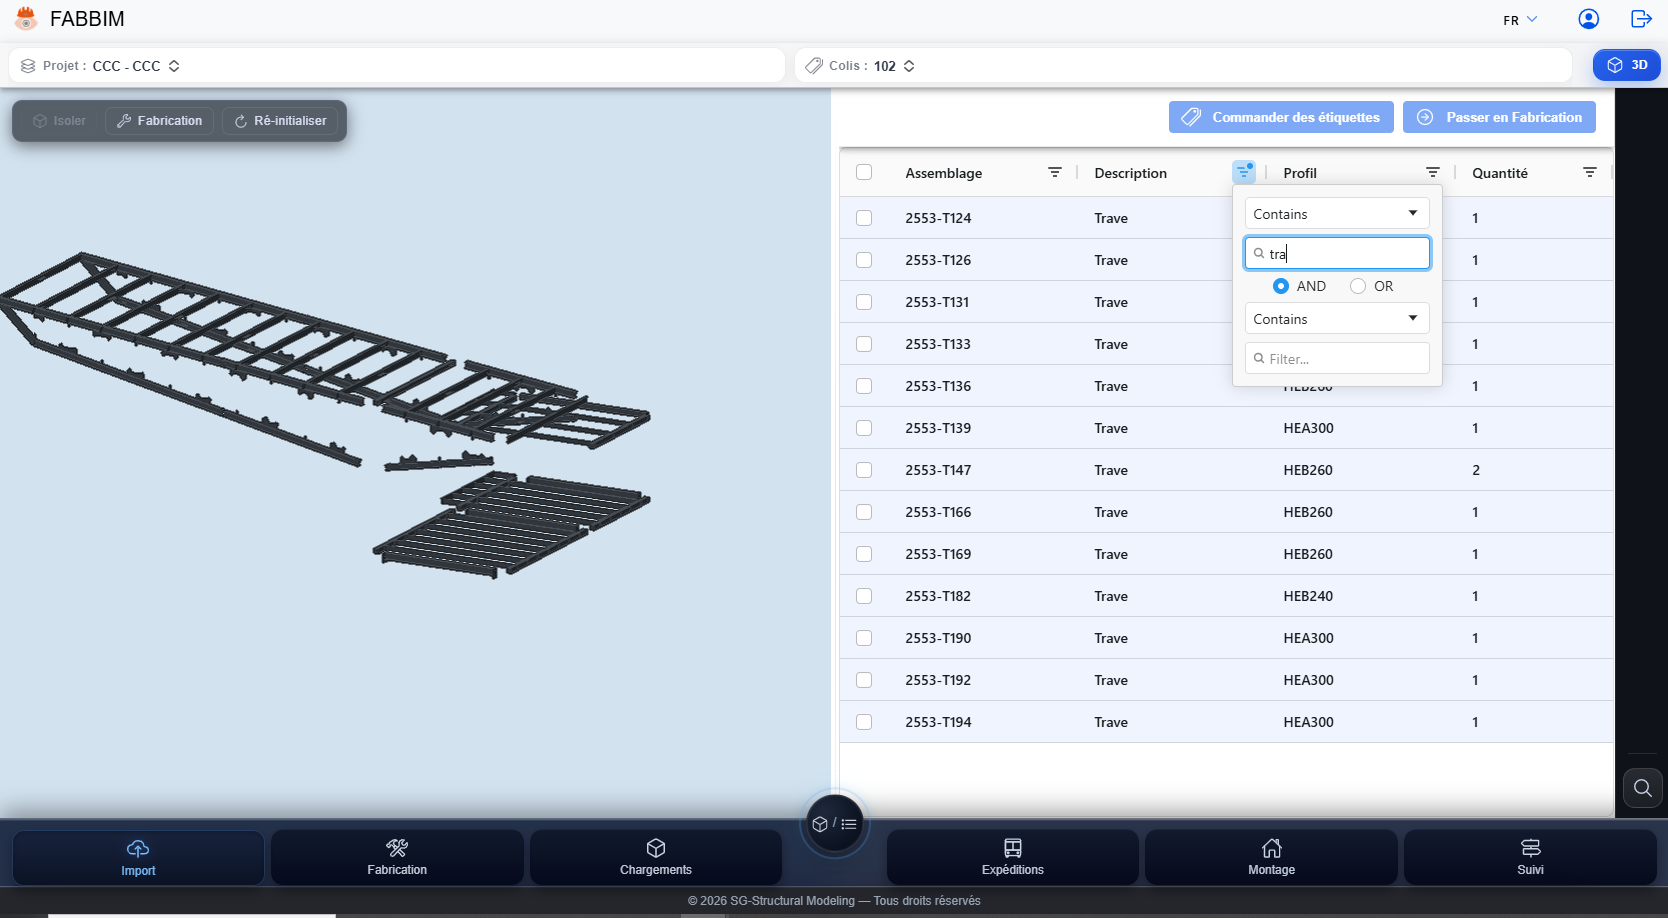
- In the assembly table, open a column filter, for example Section.
- Choose the displayed filter type and enter the value to find.
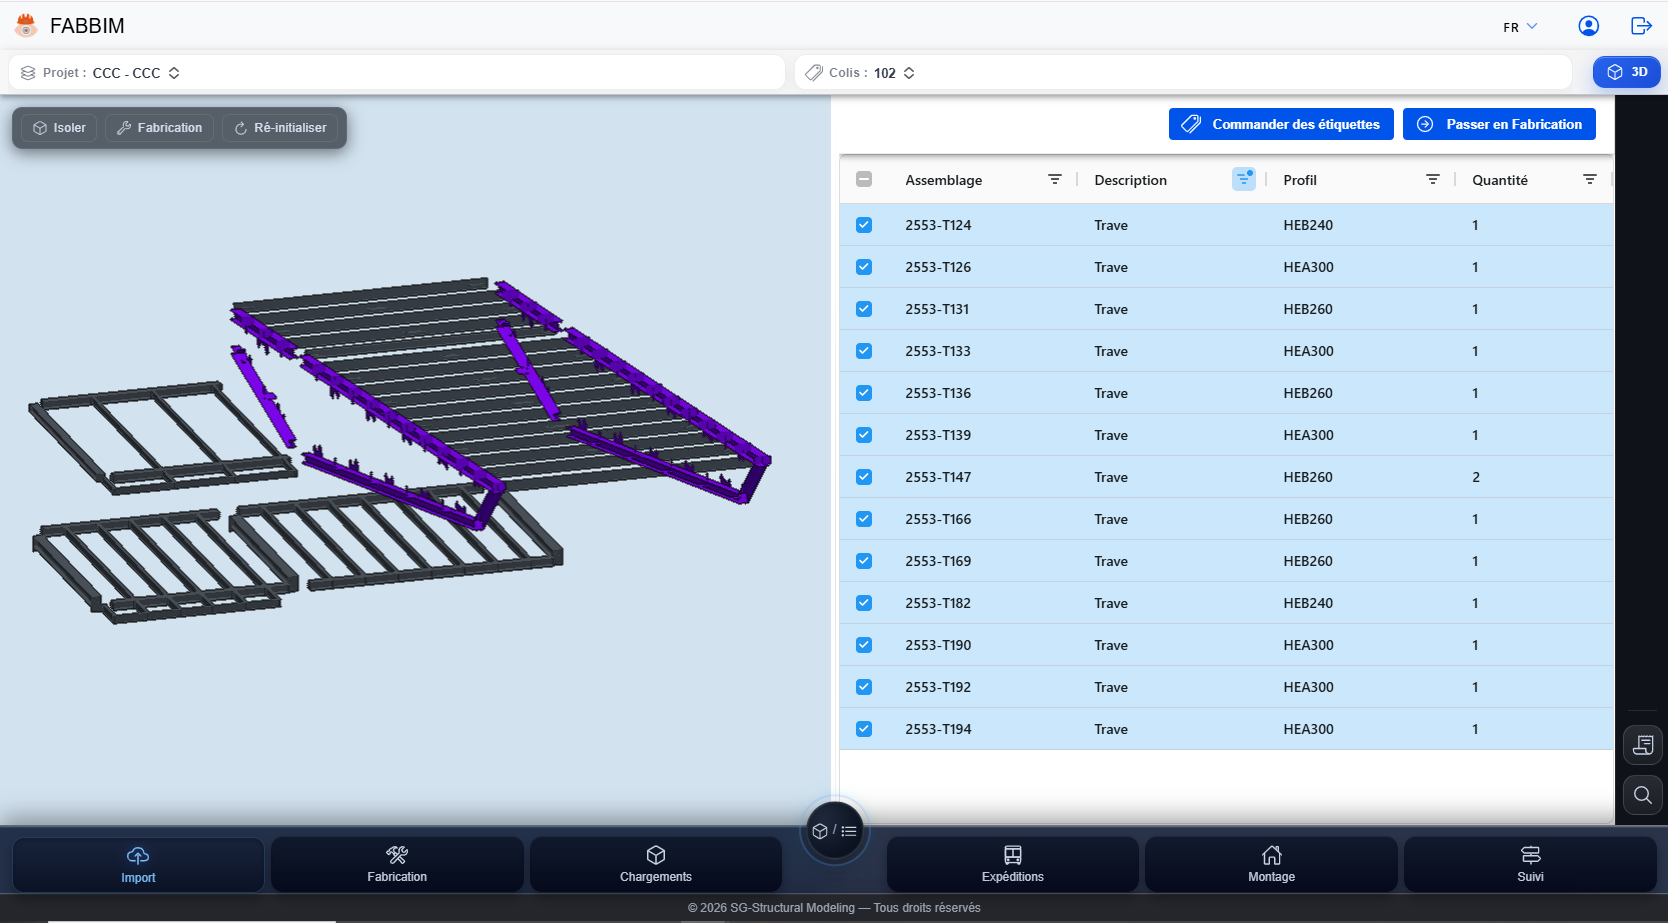
- Select the corresponding rows in the assembly list.
- Use the command Isolate to focus the 3D view on your selection, as shown in the screenshot.
View project material requirements
Display plate and section quantities calculated for the current selection.
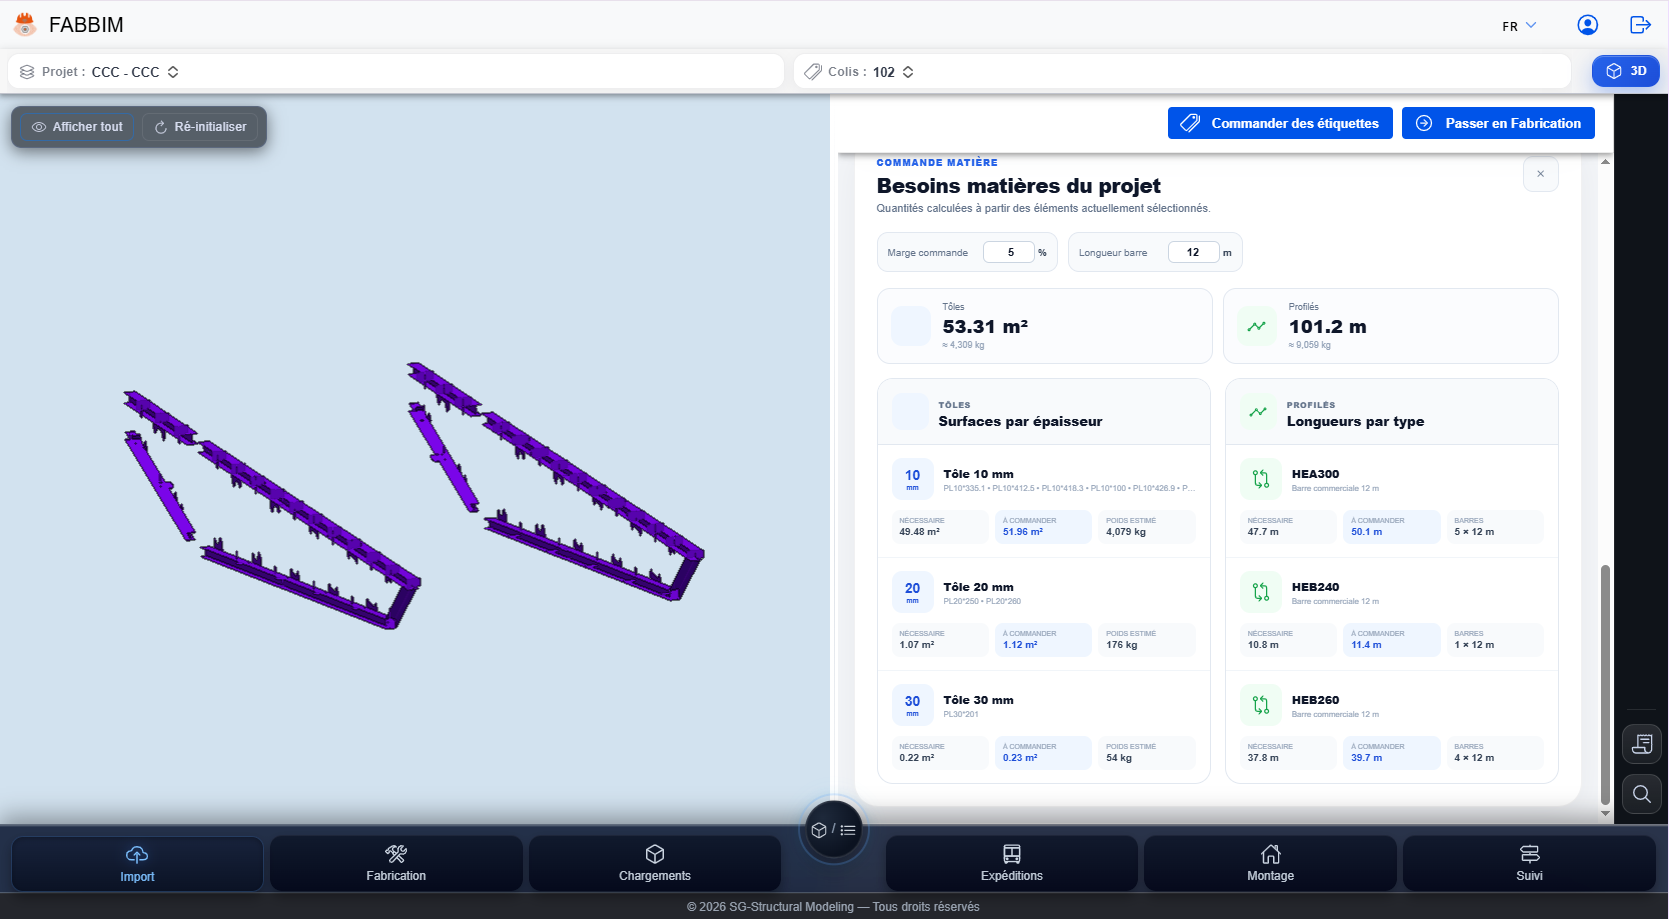
- After selecting the required elements, open the panel Project material requirements.
- View the total surface area of plates and the total length of sections.
- Browse the breakdowns Surface areas by thickness and Lengths by type.
- If needed, adjust the displayed settings for order allowance and bar length before interpreting the results.
Import a package and an IFC model
Find the commands for importing a package and selecting an IFC file.
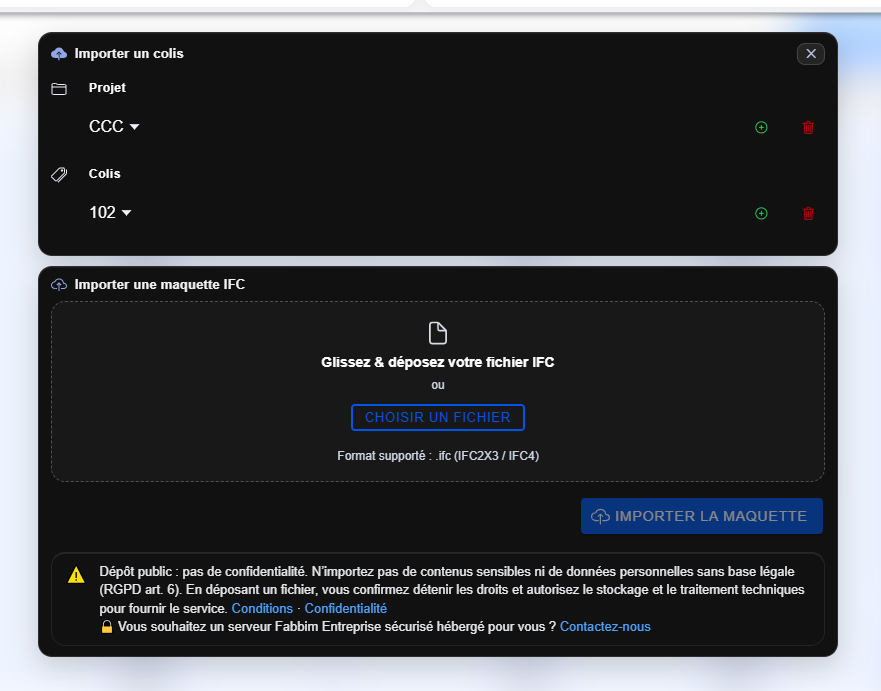
- Open the window Import a package.
- Check the project and the package selected; creation commands appear to the right of these fields.
- In Import an IFC model, drag and drop the file or click CHOOSE A FILE.
- When the file is ready, use IMPORT MODEL and follow the interface messages.
View and manage project companies
Identify project participants by their roles in fabrication and logistics.
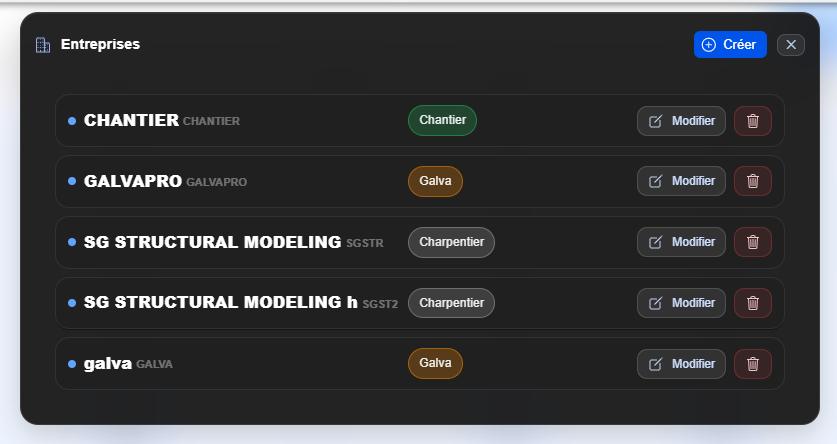
- Open the window Companies.
- View the registered companies and their categories: Steel fabricator, Galvanizer or Site.
- Use Edit to display an existing company's settings, or Create to add an entry.
- Check that all companies needed for logistics transfers appear in the list.
Create or edit a workflow between companies
Define the sequence of companies involved in part transfers.
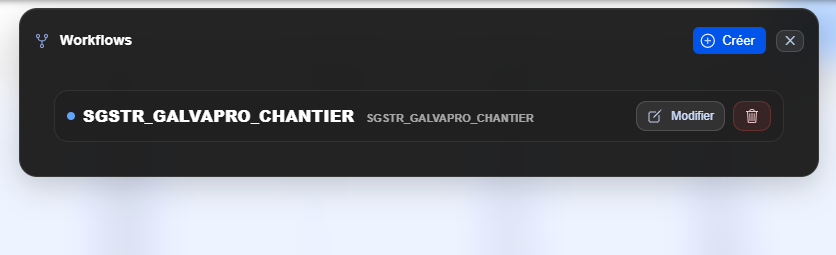
- Open the window Workflows and select Create or Edit.
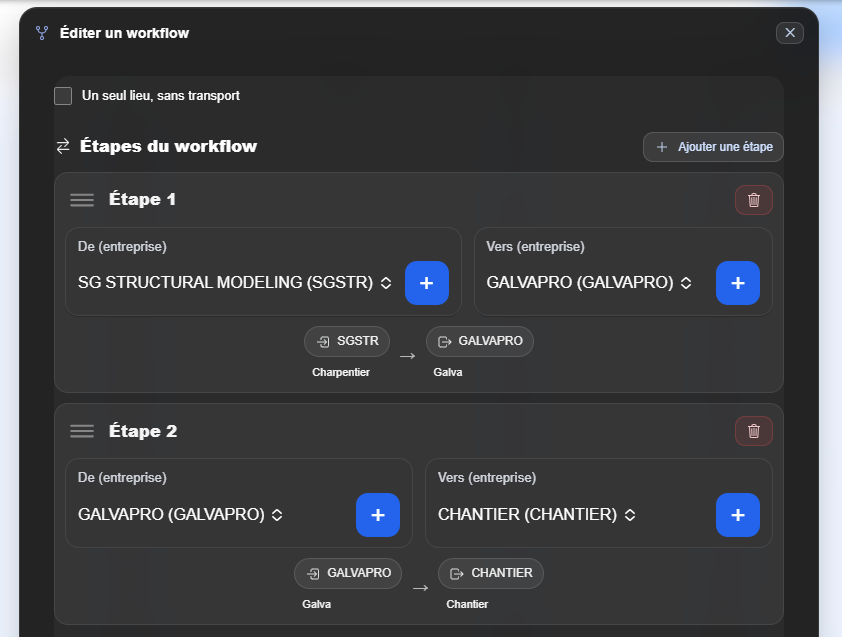
- In Edit a workflow, inspect the list of stages and the companies From and To.
- For each stage, select the departure and destination companies.
- Use Add a stage when the route includes several transfers.
- In the example, the route goes from SGSTR to GALVAPRO, then from GALVAPRO to SITE.
Define automatic logistics actions
Specify which operations must be included in the workflow at each stop.
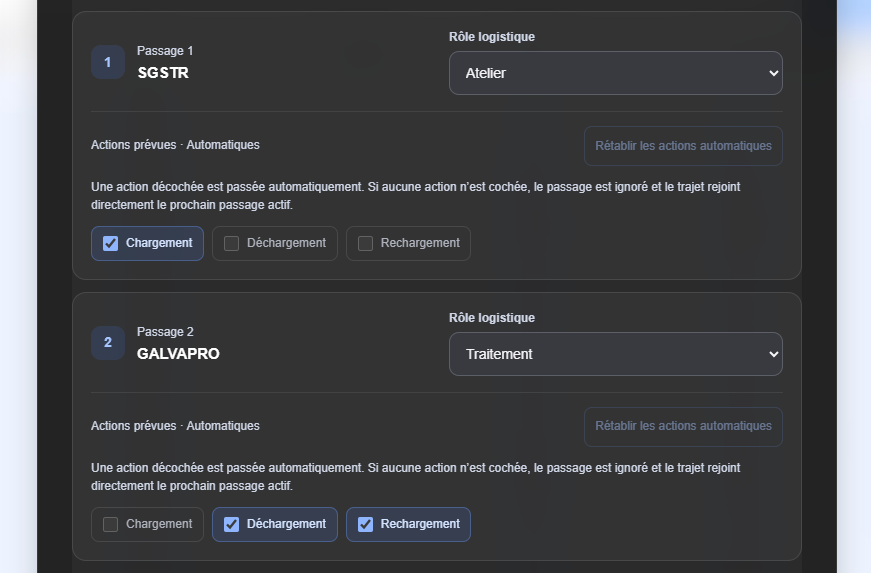
- In the route configuration, check the stops associated with the companies.
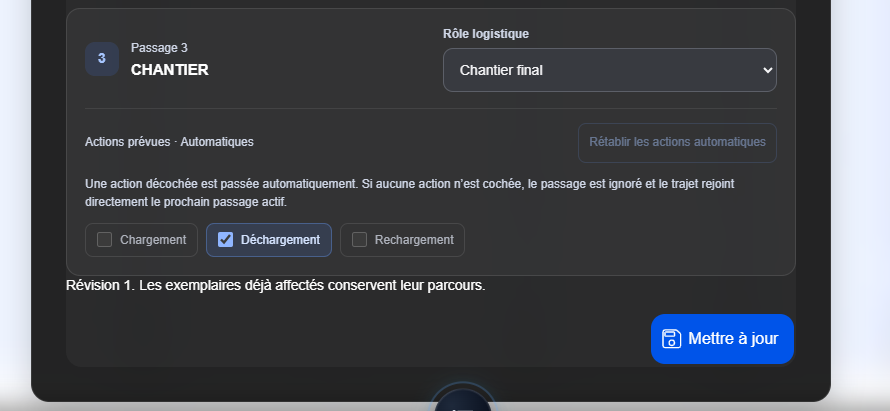
- Assign the logistics role that applies: in the example, Workshop, Treatment and Final site.
- Check the boxes Loading, Unloading and Reloading for each stop.
- The screenshot shows Loading at the first stop, Unloading and Reloading at the second, then Unloading at the final site.
- Confirm with Update once the actions have been checked.
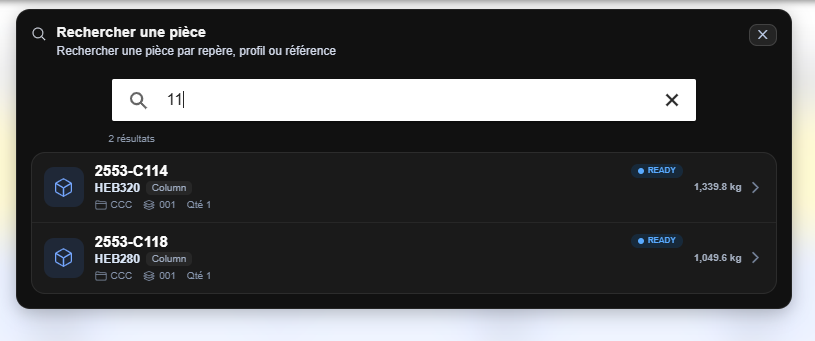
Search for a part by mark, section or reference
Quickly find an assembly and its main information in the project.
- Open the window Search for a part.
- Enter a mark, a section or a reference in the search field.
- View the results: mark, section, quantity, status and associated information.
- Select the required row to open the corresponding element when this action is available.