Fabbim · User manual · Chapter 05

05. Receipt at the galvanizer and onward dispatch

Receive parts at the galvanizer, record their unloading and organise their onward dispatch to site.

CHAPTER 05

Receipt at the galvanizer and onward dispatch to site

Receive parts at the galvanizer, record their unloading and organise their onward dispatch to site.

Before you start. The project workflow must include the galvanizer and subsequent dispatch to site. The invited company must have the rights required for its operations.

Invite the galvanizer and define access rights

Give the receiving company access to the project, with a role suited to its operations.

  1. In the project, open Model sharing then the action Invite.
  2. Enter theemail address of the user to invite.
  3. Choose the role Editor (can update by scanning) and select the authorised company, here GALVAPRO.
  4. Click Send invitation, then check that the user appears in the list with the status Invitation.
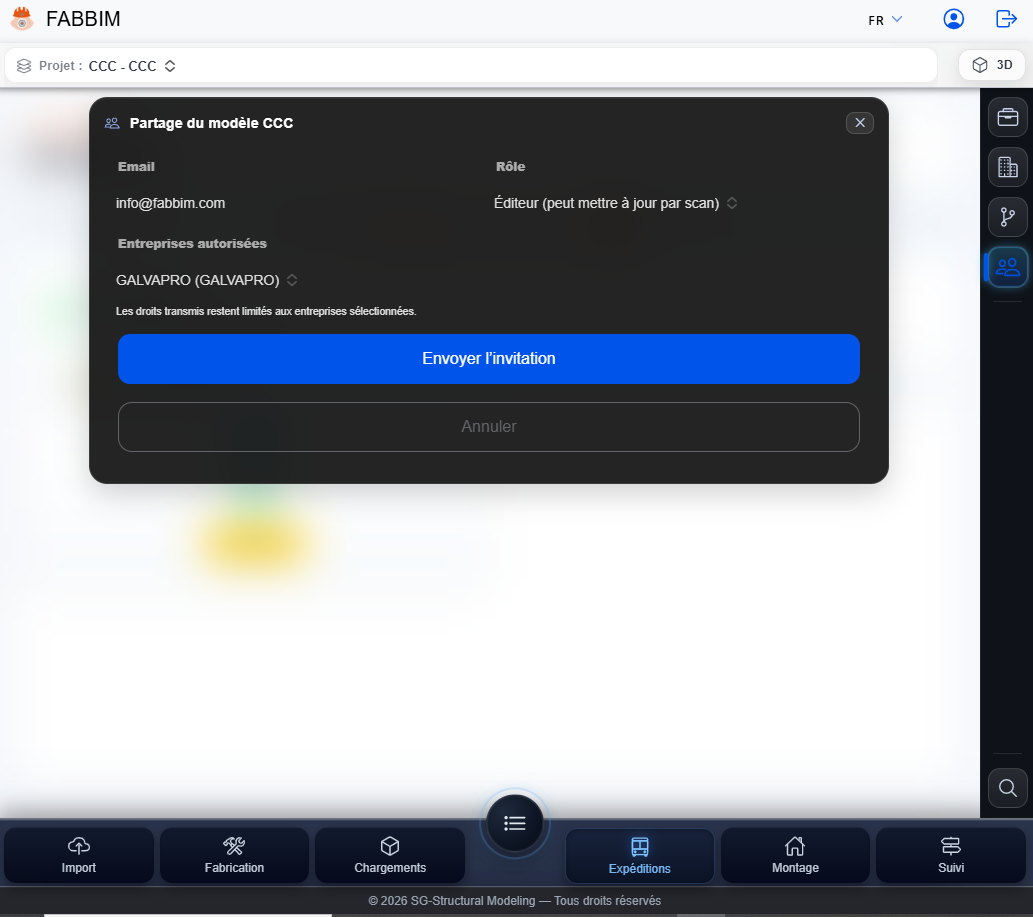
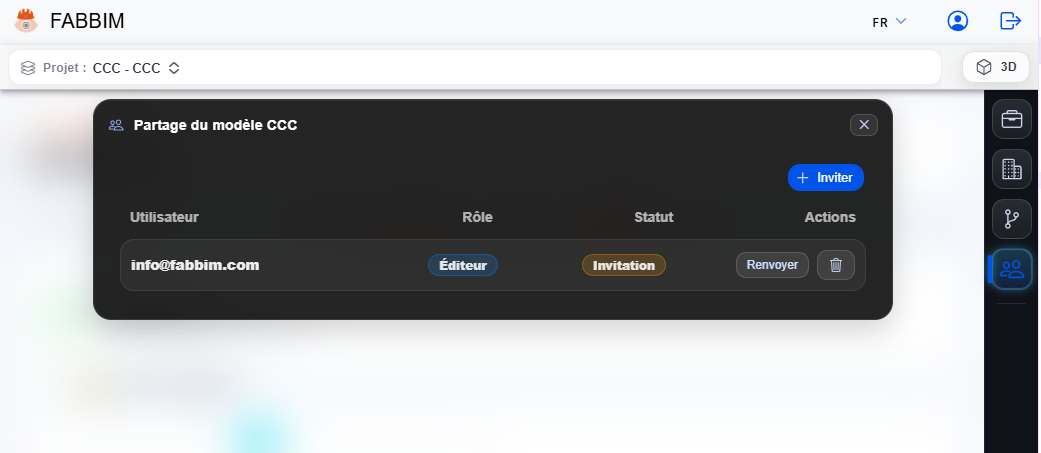
CCC Model sharing window in Fabbim, inviting an editor authorised for galvanizing company GALVAPRO.
Figure 1 — Project sharing form: Editor role and authorised company GALVAPRO.
Fabbim project sharing list showing an Editor user with Invitation status.
Figure 2 — Access list: invitation sent and awaiting acceptance.
Good to know. The invited user's permissions depend on the selected role and companies. Invitation status does not yet mean that the person has accepted access.

Activate the invitation and select the project

The recipient uses the personal link received by email to access the shared project.

  1. Open the email FABBIM invitation — project access sent by Fabbim.
  2. Click the personal invitation link then sign in to Fabbim, or create an account if needed.
  3. On the home screen, select the shared project from the list.
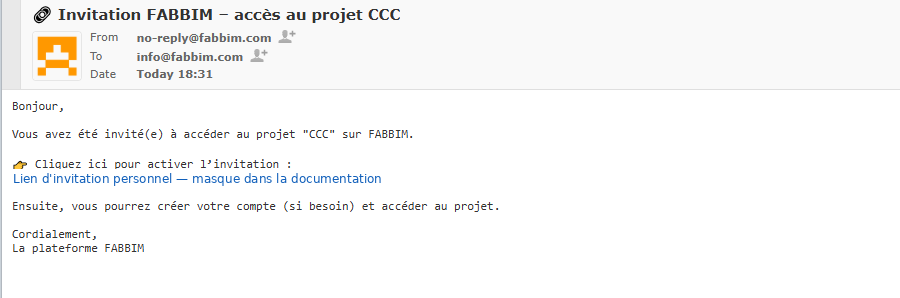
Fabbim invitation email for a shared project, with the security token hidden.
Figure 3 — Example project invitation email, with the personal link hidden in the guide.
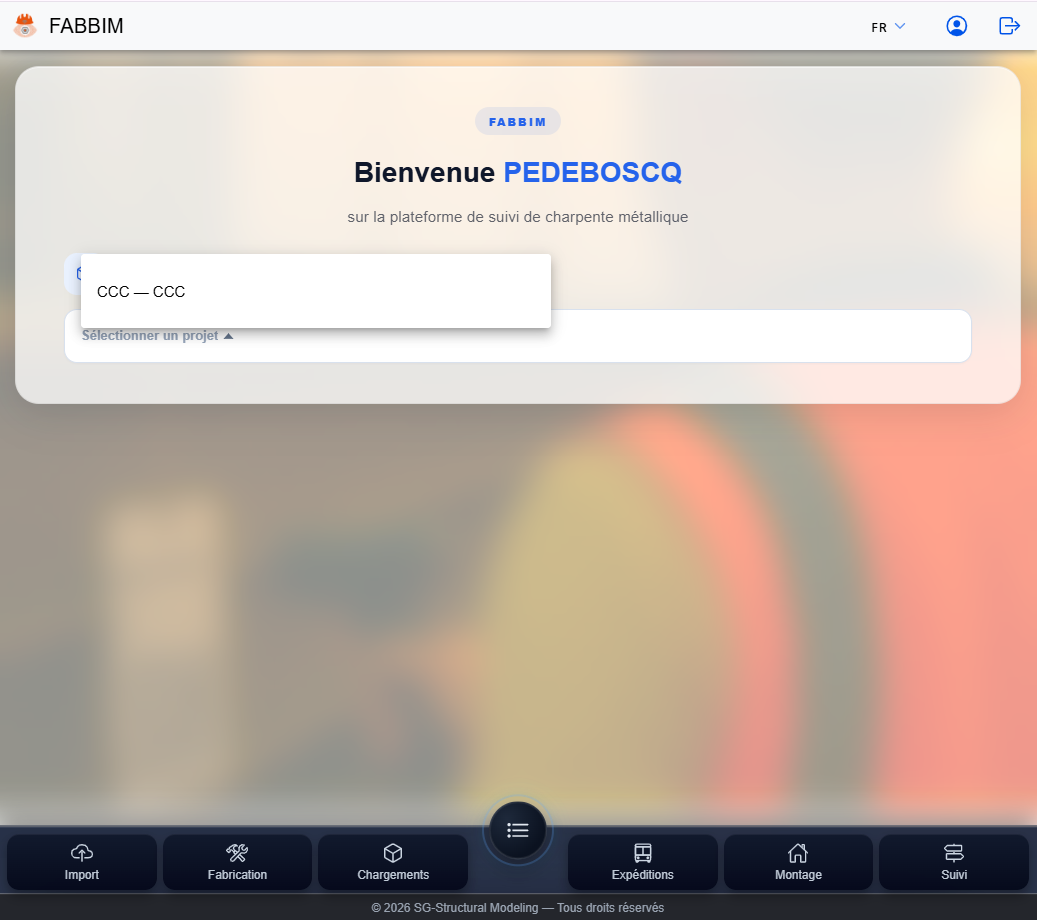
Fabbim home screen with project CCC selected from an invited user account.
Figure 4 — Selecting project CCC in the invited user's account.
Security. The invitation link is personal. Never publish its token in a screenshot or public document.

Confirm receipt of the truck at the galvanizer

Record the truck's arrival, then enter the galvanizing batch reference.

  1. In Dispatches, open the relevant truck under In transit.
  2. Check the parts list and click Confirm receipt.
  3. In the dialog Galvanizer batch reference, enter the batch reference, then click Confirm.
  4. Check that the truck then appears under Delivered.
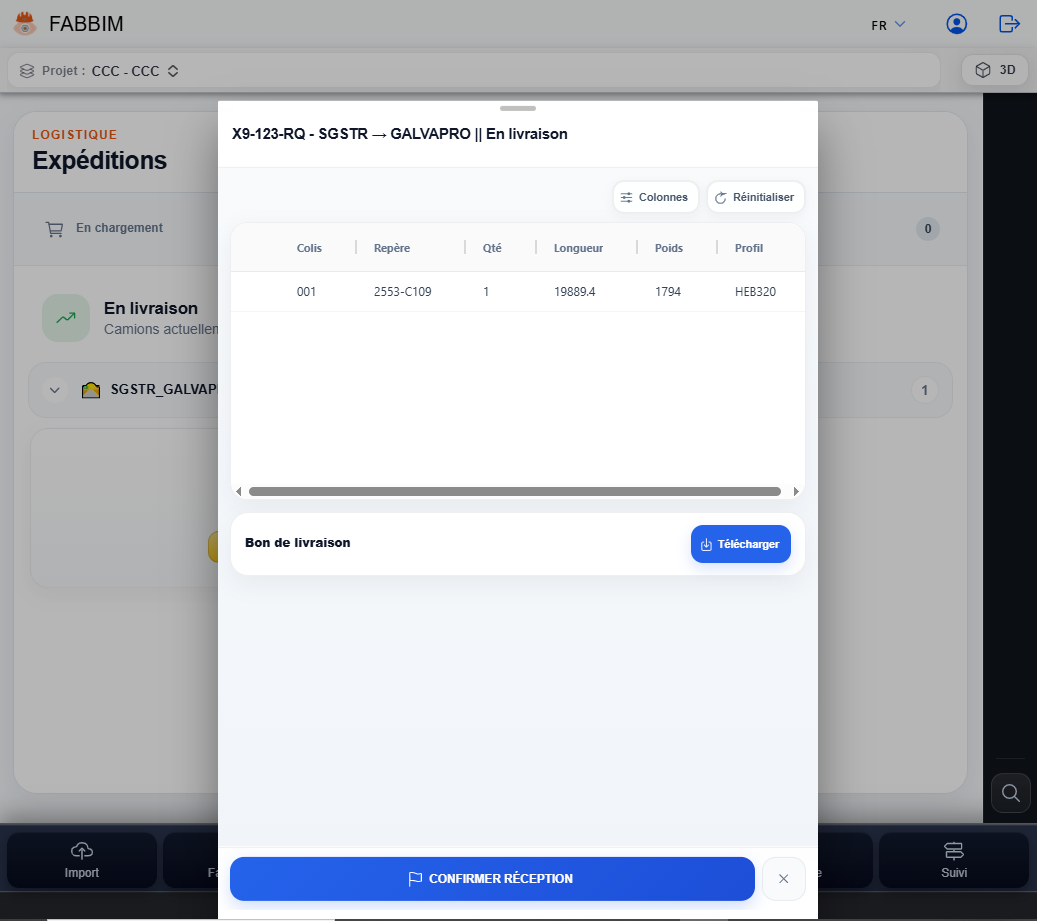
Fabbim Dispatches: details of a truck in transit from SGSTR to GALVAPRO with the Confirm receipt button.
Figure 5 — SGSTR → GALVAPRO truck in transit, ready for receipt confirmation.
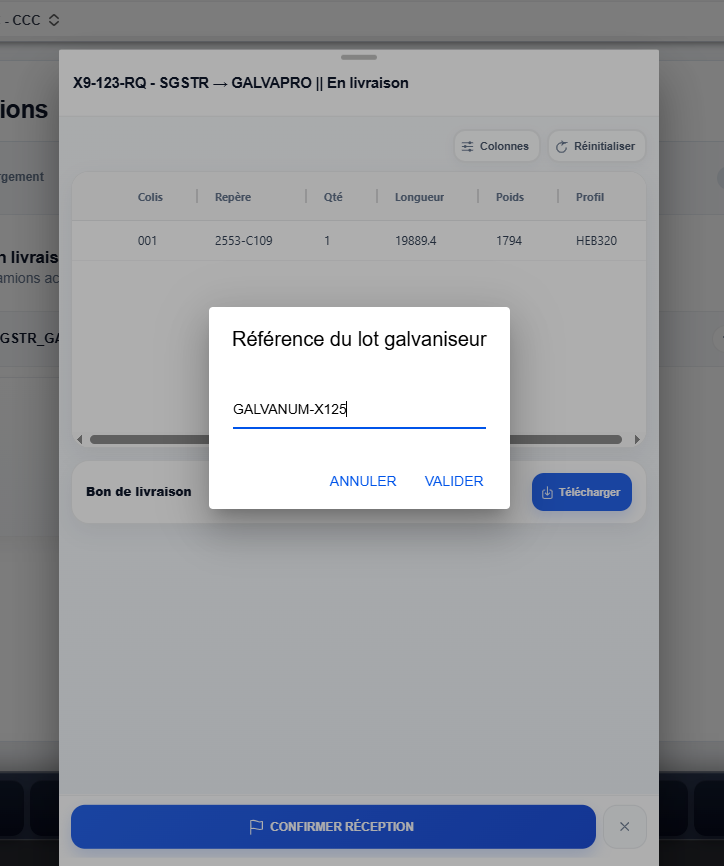
Fabbim window requesting galvanizing batch reference GALVANUM-X125 when receiving the truck.
Figure 6 — Entering the galvanizer batch reference.
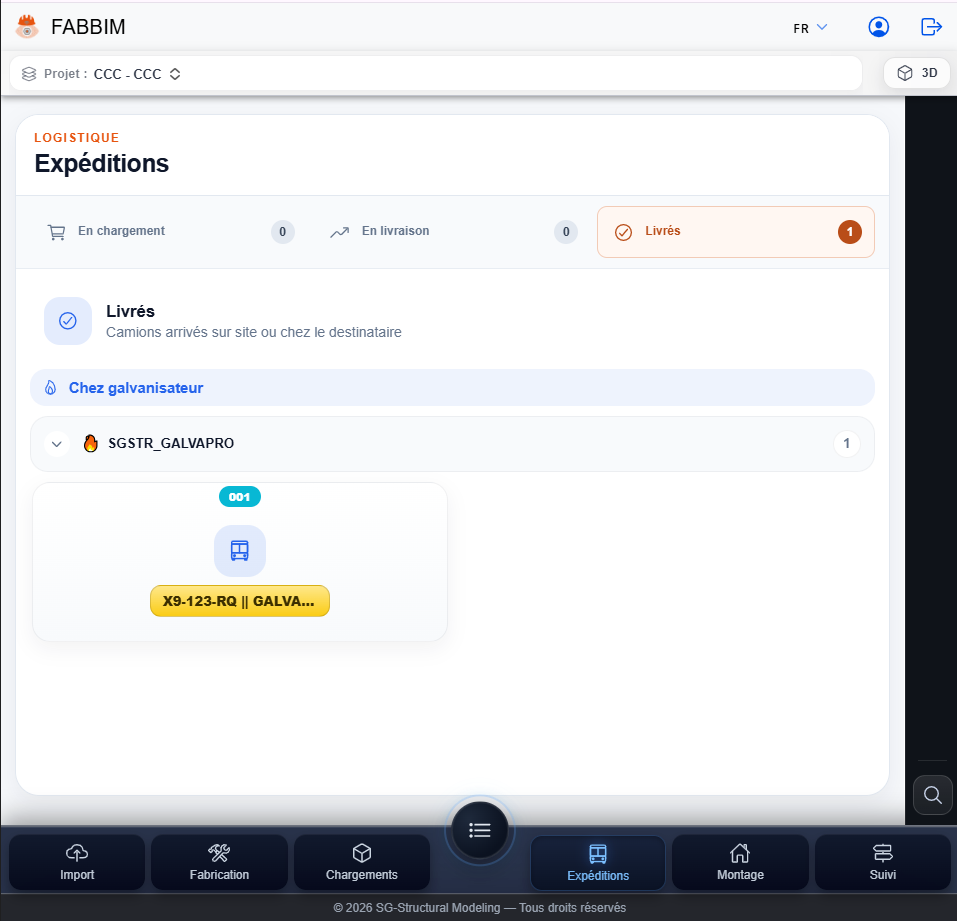
Fabbim Dispatches: truck received at the galvanizer and listed under Delivered.
Figure 7 — The received truck is now listed under Delivered.
Important. The batch reference must match the galvanizer's actual records. It will help locate the parts during subsequent operations.

Unload received parts

Confirm unloading of assemblies at the galvanizer by scanning or using the procedure without scanning.

  1. Open the truck under Delivered, then click Unload.
  2. In the list of marks, identify the parts to unload and select the relevant instances.
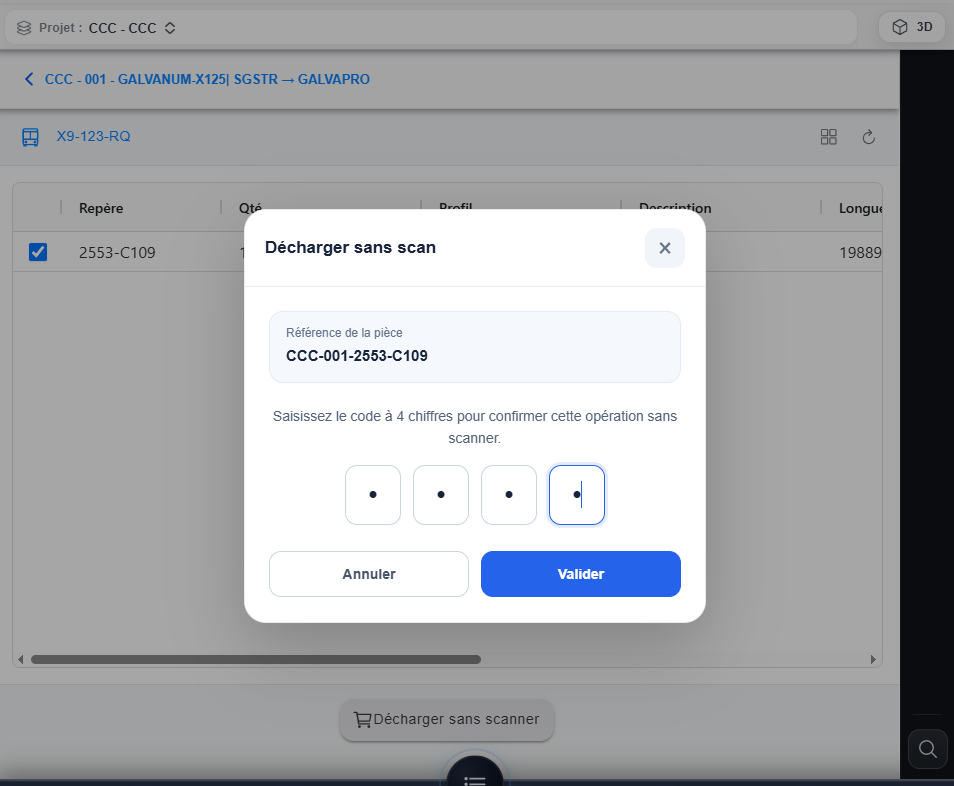
  3. If needed, use Unload without scanning and enter the four-digit confirmation code requested.
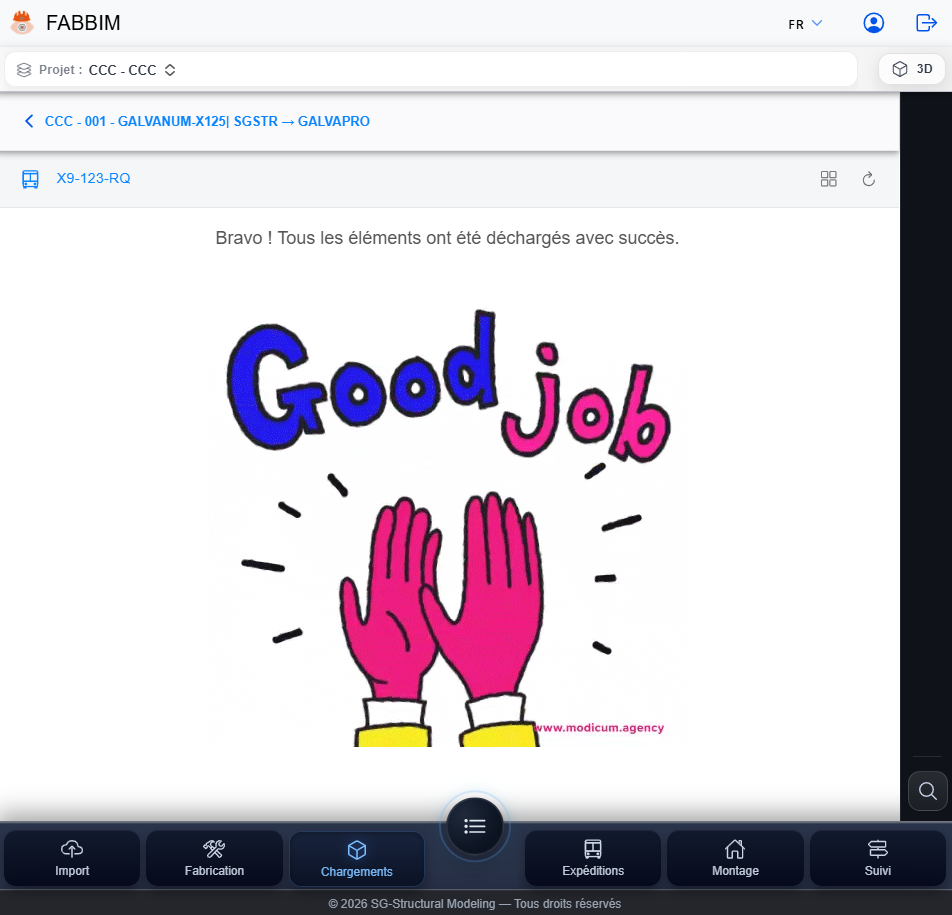
  4. Confirm and check the message indicating that the elements have been unloaded successfully.
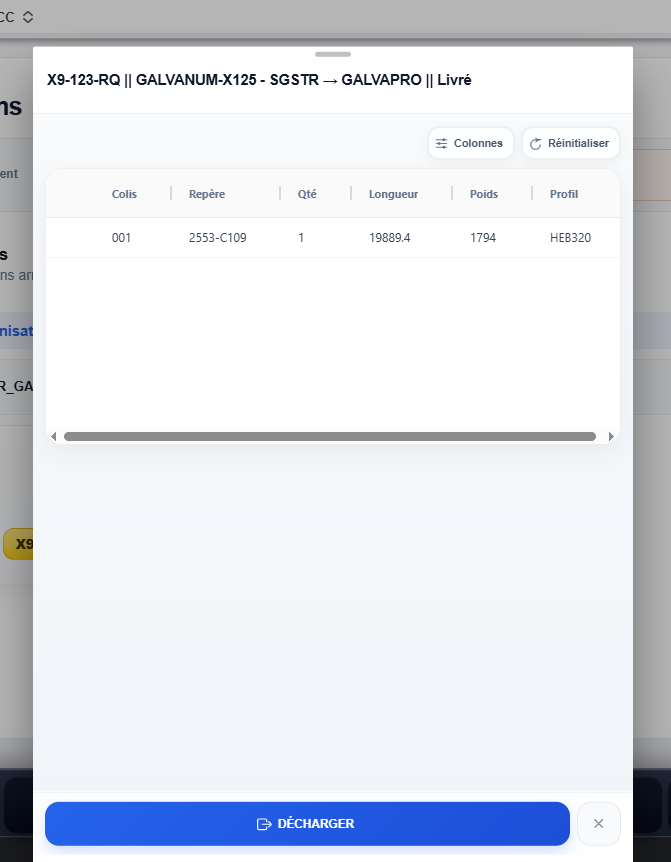
Fabbim: details of the truck delivered to GALVAPRO with parts list and Unload button.
Figure 8 — Delivered truck details with the Unload action.
Fabbim: assembly row selected for unloading, with the Unload without scanning action.
Figure 9 — Selecting a part and the Unload without scanning command.
Fabbim Unload without scanning dialog requesting a four-digit code for a part.
Figure 10 — Confirmation code for unloading without scanning.
Fabbim screen reporting that all truck elements have been unloaded successfully.
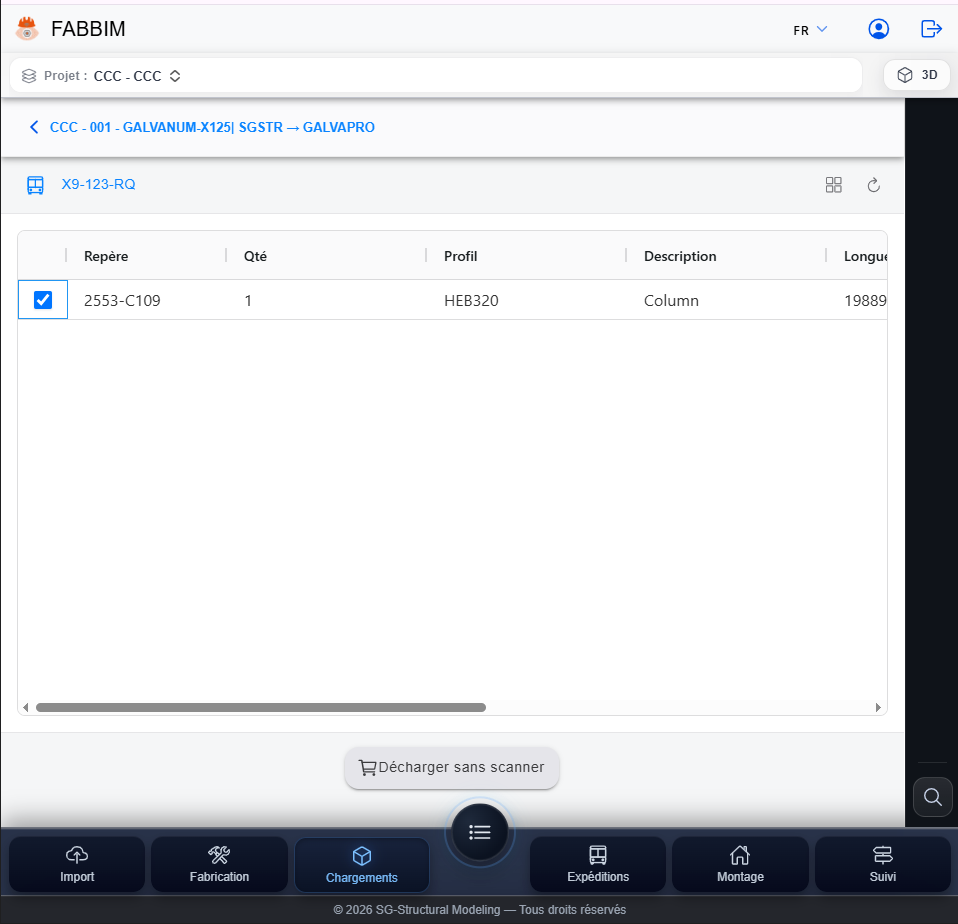
Figure 11 — Confirmation that unloading is complete.
Check before proceeding. Confirmation without scanning is an alternative to reading labels. Always check the mark and quantity before confirming.

Open onward dispatch after galvanizing

Find the received parts and prepare their departure to the next stage of the workflow.

  1. Open the section Loading / Deliveries.
  2. Select the tab Galvanizer / painter onward dispatch.
  3. In the row for company GALVAPRO, find the package and its destination To site.
  4. Click Dispatch again to open loading for galvanized parts.
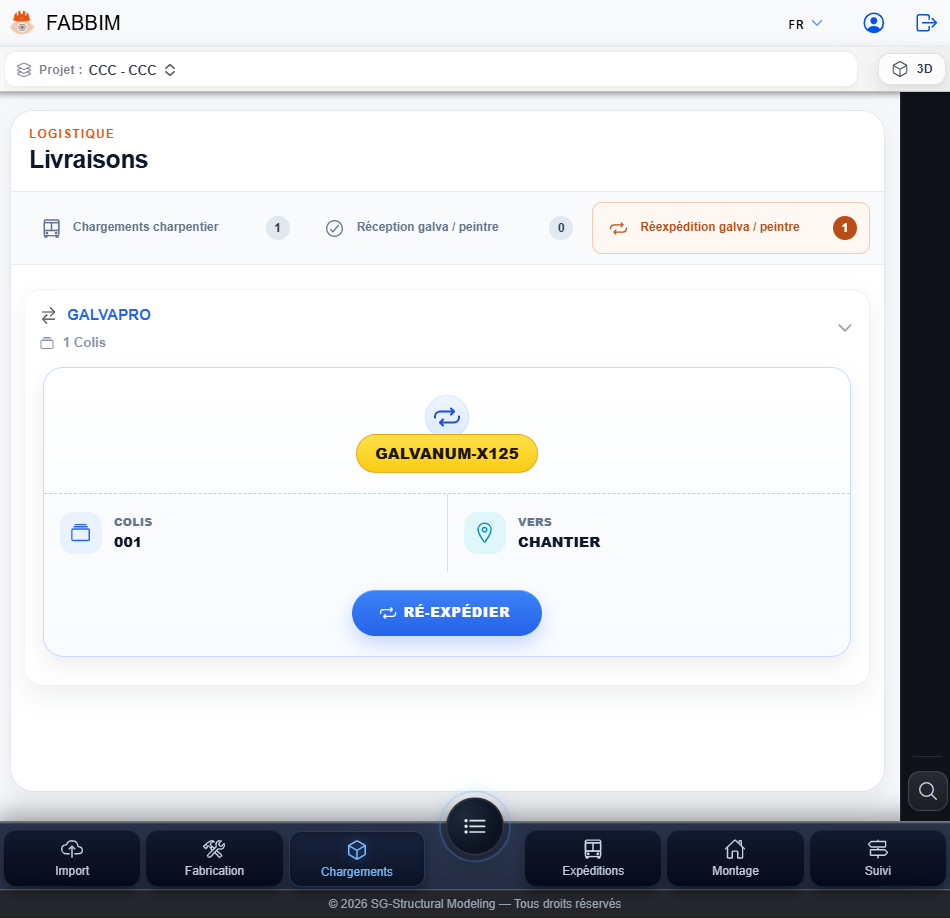
Fabbim Deliveries screen: onward dispatch after galvanizing from GALVAPRO to site and Dispatch again button.
Figure 12 — Galvanizer / painter onward dispatch tab and To site destination.
Good to know. Available destinations depend on the transport route defined in the project workflow.

Reload galvanized parts

Select the parts ready to leave, then check the load contents.

  1. In the list Galvanized parts, select the relevant assemblies.
  2. Scan the labels or use Reload without scanning depending on the available actions.
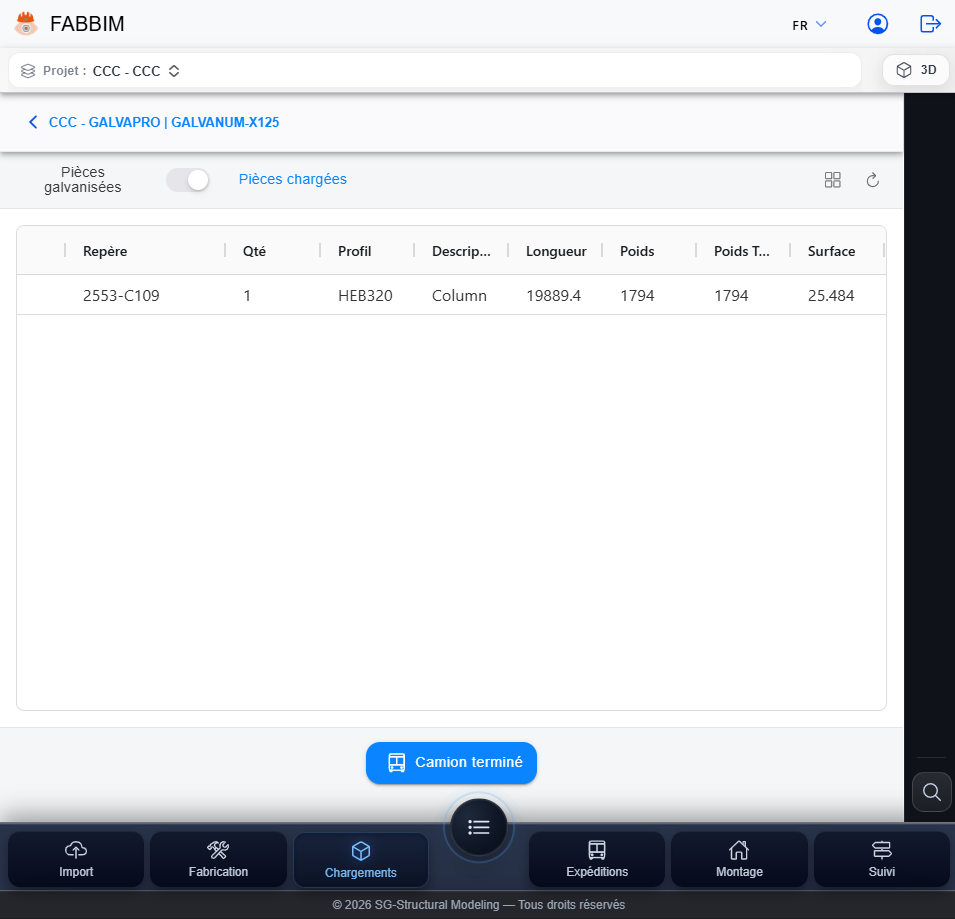
  3. Switch to Loaded parts to check the elements included.
  4. Click Truck complete when loading is complete.
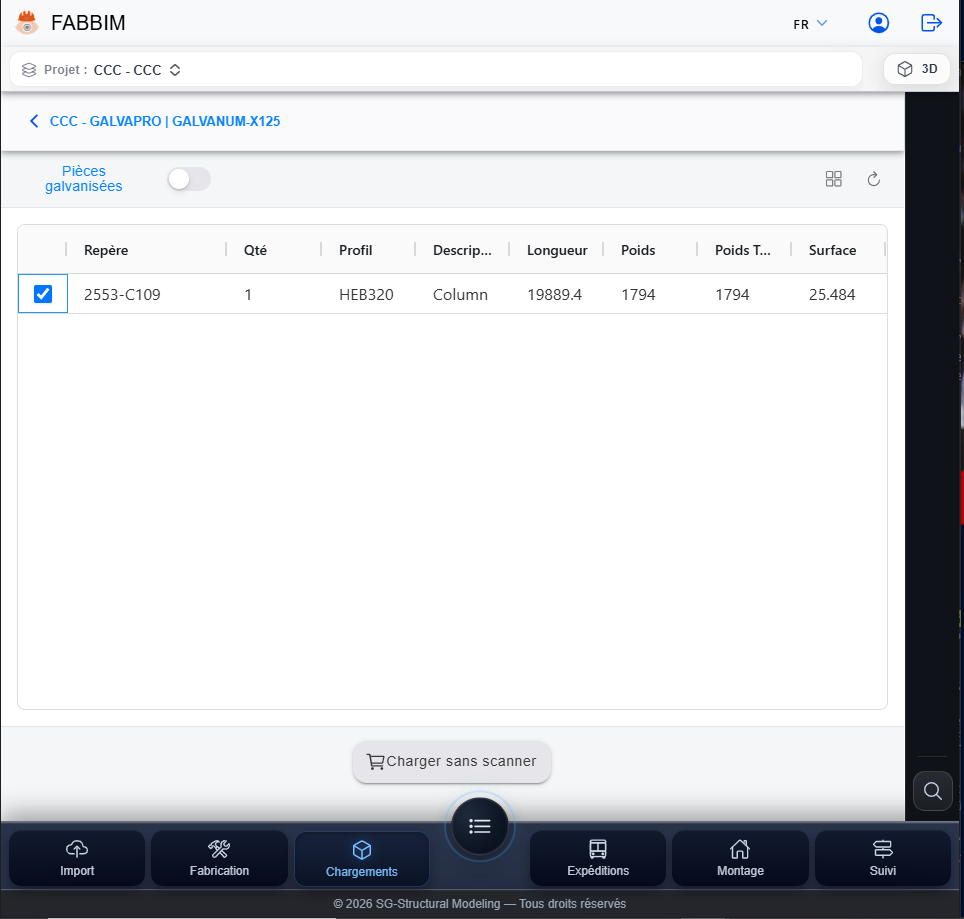
List of galvanized parts in Fabbim with mark selection and Reload without scanning command.
Figure 13 — Galvanized parts and Reload without scanning action.
Fabbim Loaded parts tab displaying the Truck complete button after reloading.
Figure 14 — Loaded parts with the Truck complete button.
Tip. Check marks and quantities in Loaded parts before completing the truck.

Name the onward dispatch truck

Create the truck that will carry the galvanized parts to site.

  1. In the window Name the truck, enter its identifier or registration number.
  2. Click Confirm.
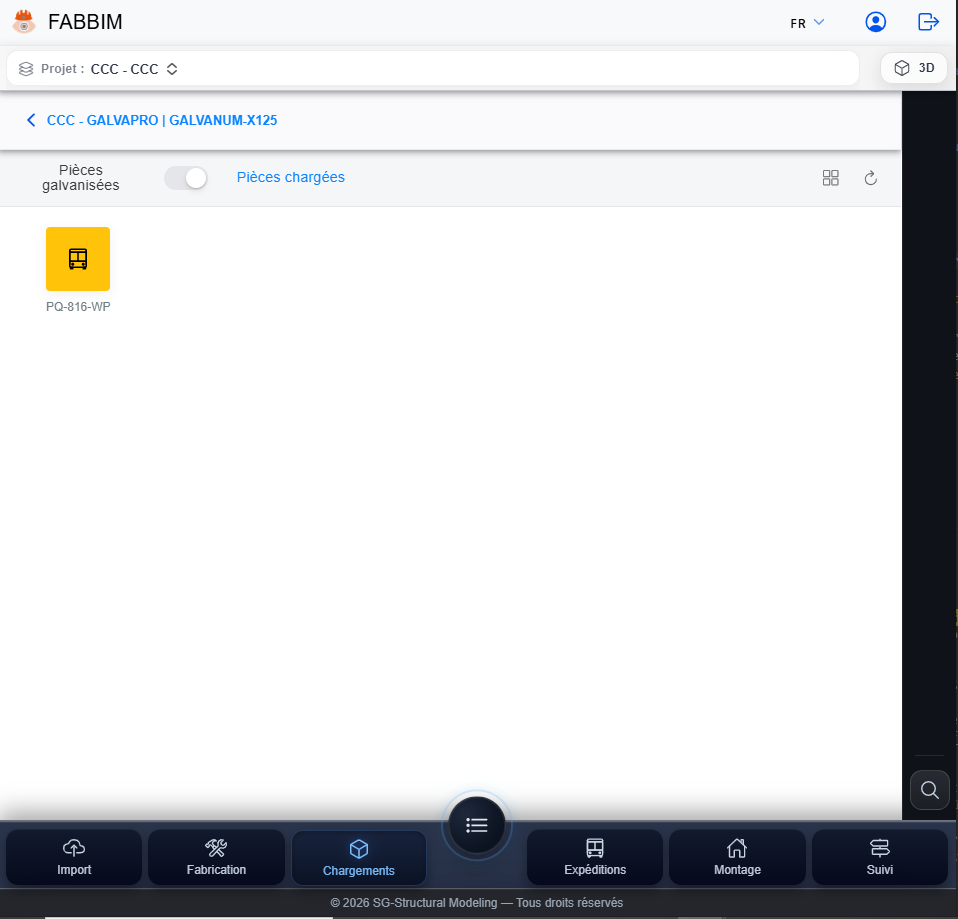
  3. Check that the new truck card appears in the list of loads after galvanizing.
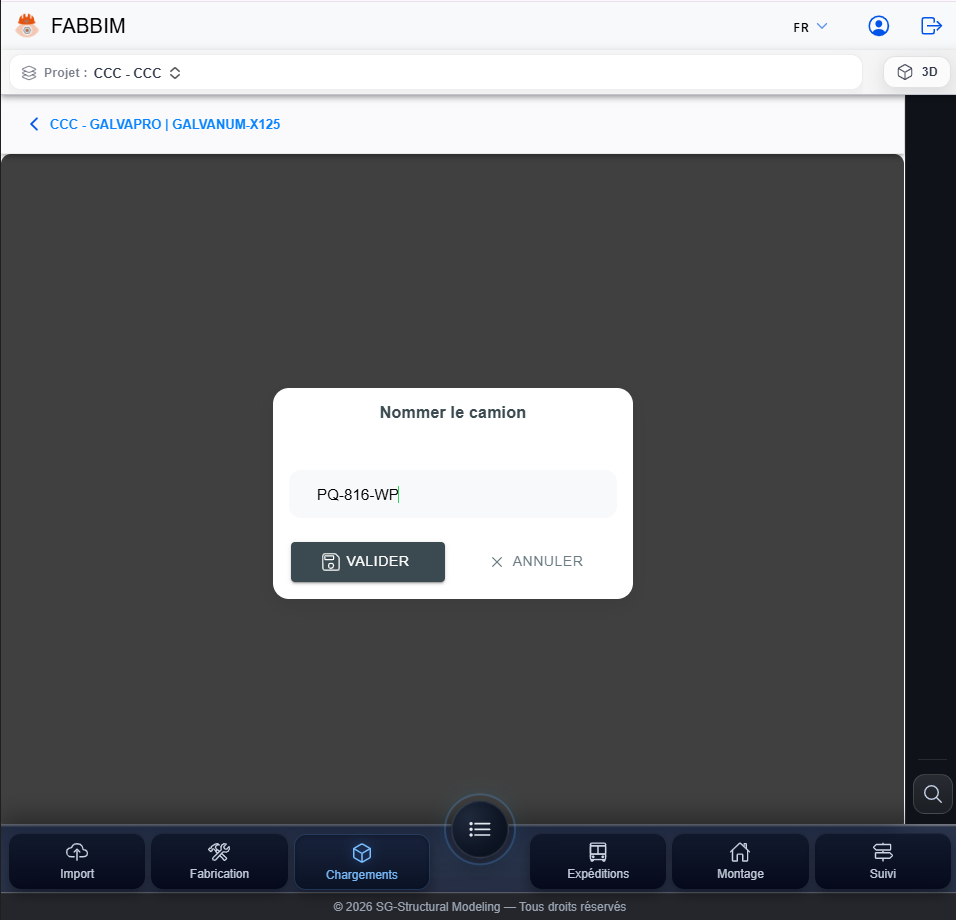
Name the truck window in Fabbim with a vehicle identifier for onward dispatch after galvanizing.
Figure 15 — Entering the onward dispatch truck identifier.
Fabbim: onward dispatch truck after galvanizing shown in the loading list.
Figure 16 — Truck PQ-816-WP created in loads after galvanizing.

Confirm departure and prepare the delivery note

Confirm the truck's departure and let Fabbim prepare the dispatch document.

  1. Open the created truck, then check the marks, quantities and load details.
  2. Click Truck departed to confirm its departure.
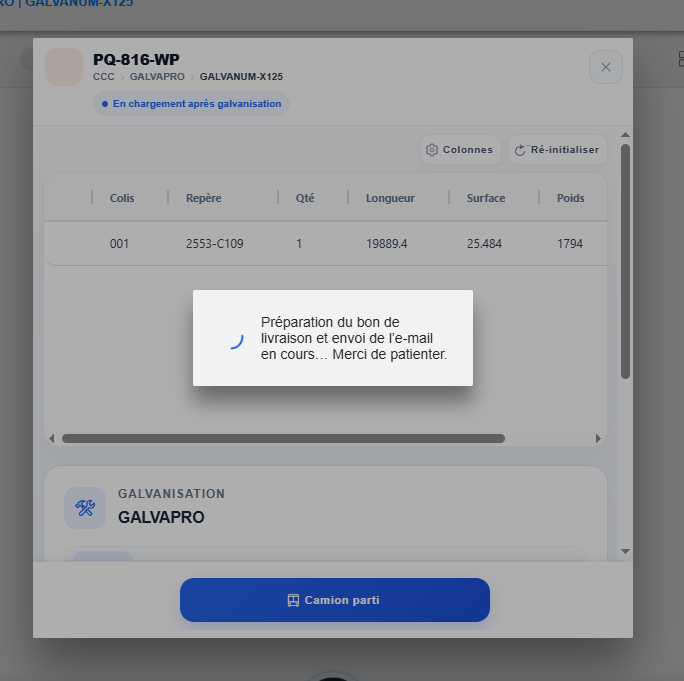
  3. The platform displays Preparing delivery note and sending email while processing.
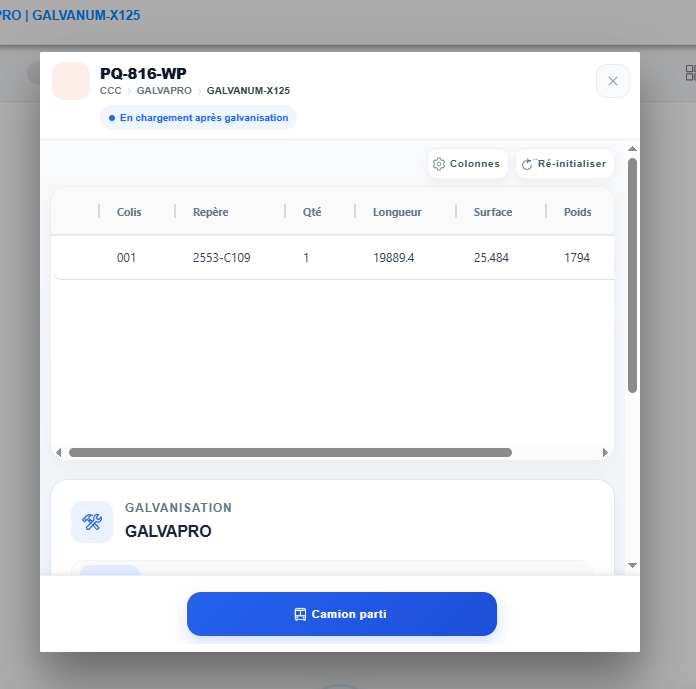
Fabbim truck details after galvanizing with loaded parts and Truck departed button.
Figure 17 — Checking the loaded truck with the Truck departed action.
Fabbim message indicating preparation of the PDF delivery note and email when the truck departs.
Figure 18 — Preparing the delivery note and email after departure confirmation.
Good to know. The screen shows document preparation and sending. Check the recipient's inbox; this screenshot alone does not confirm email delivery.

Track the truck in transit to site

Find the truck that left the galvanizer and view its logistics status.

  1. Return to the section Dispatches.
  2. Open the tab In transit to display trucks currently in transit.
  3. Find the example truck under the route GALVAPRO_CHANTIER : it is ready for the next step of receipt on site.
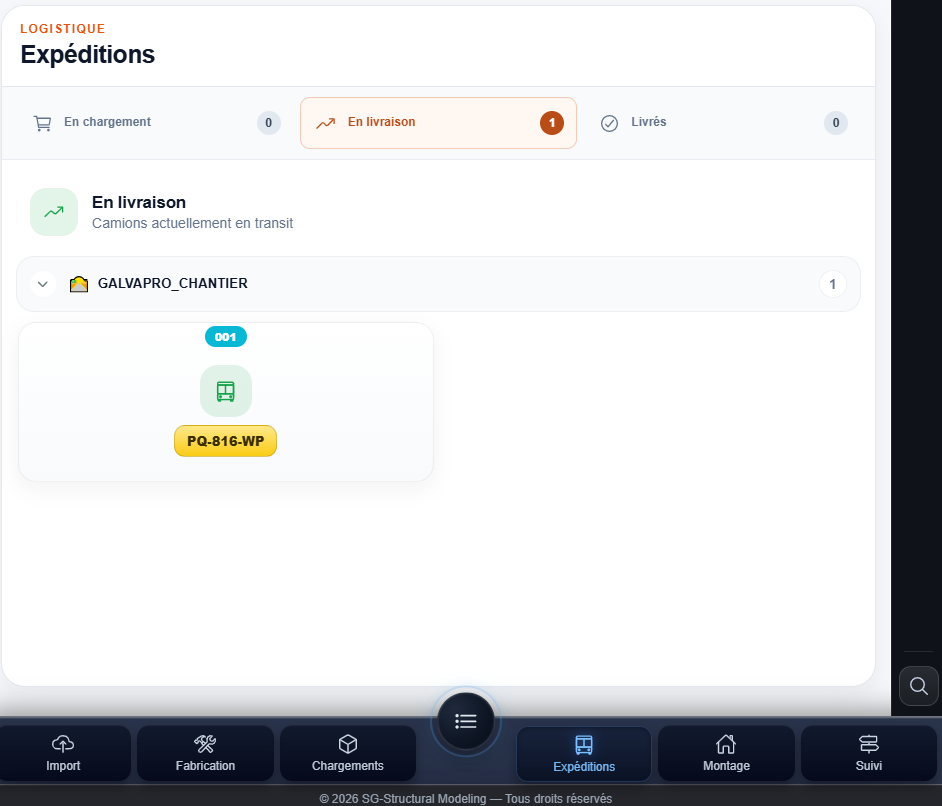
Fabbim Dispatches: onward dispatch truck in transit from galvanizer GALVAPRO to site.
Figure 19 — Truck from GALVAPRO to site under In transit.
Next in the workflow. Receipt on site is a separate operation, to be performed when the truck arrives at its destination.