CHAPTER 04
Loading and dispatch
From the first scan to tracking the truck and receiving the delivery note by email.
Before you start. Select a project containing assemblies to dispatch. The logistics workflow must include the transfer between the companies concerned; available actions depend on your role.
Open deliveries and choose a package
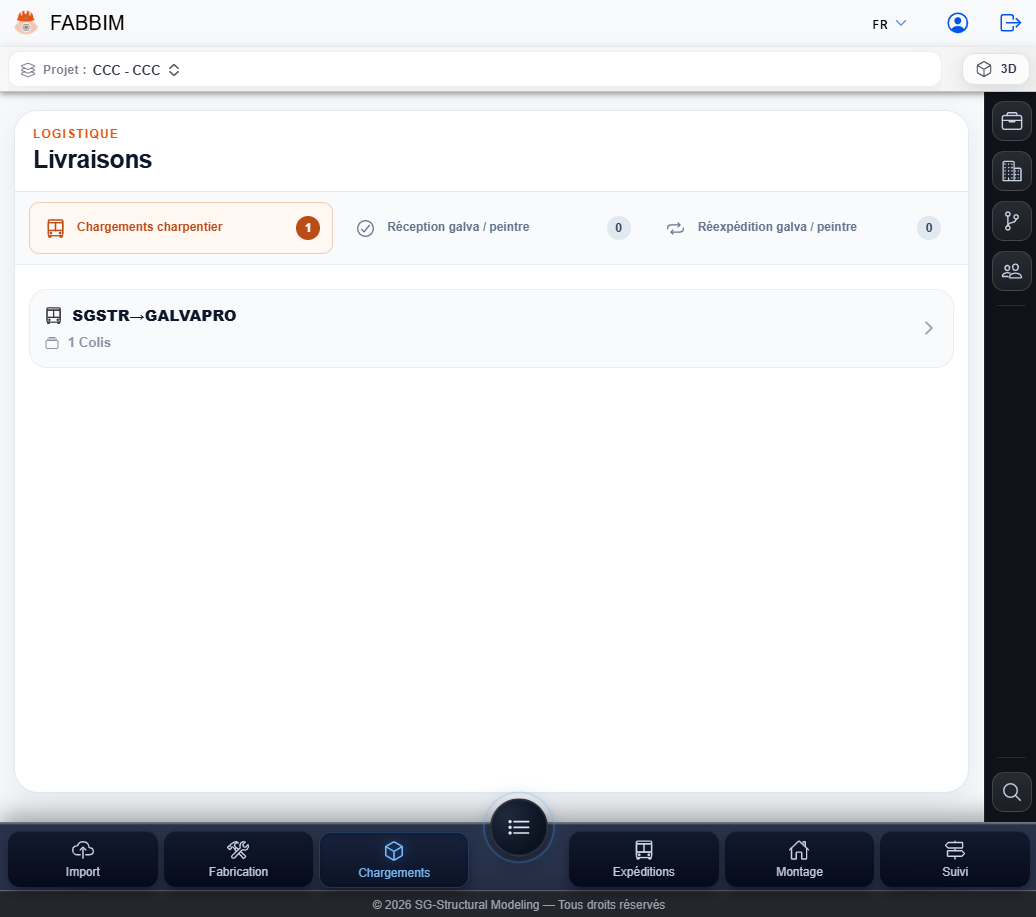
Find the loads to prepare in the relevant project and logistics workflow.
- Select the project at the top of the interface, then open the section Loading / Deliveries.
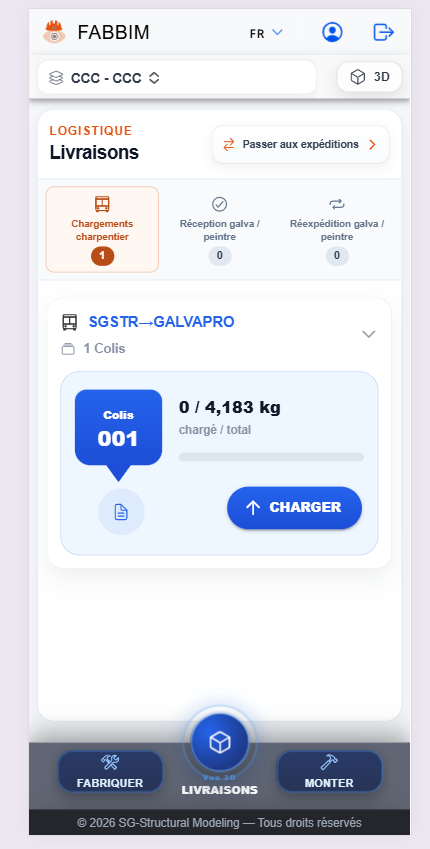
- In Fabricator loading, find the route between companies. The example shows SGSTR → GALVAPRO.
- Expand the route to display package 001, its total weight and the button LOAD.
View the dispatch list and parts to load
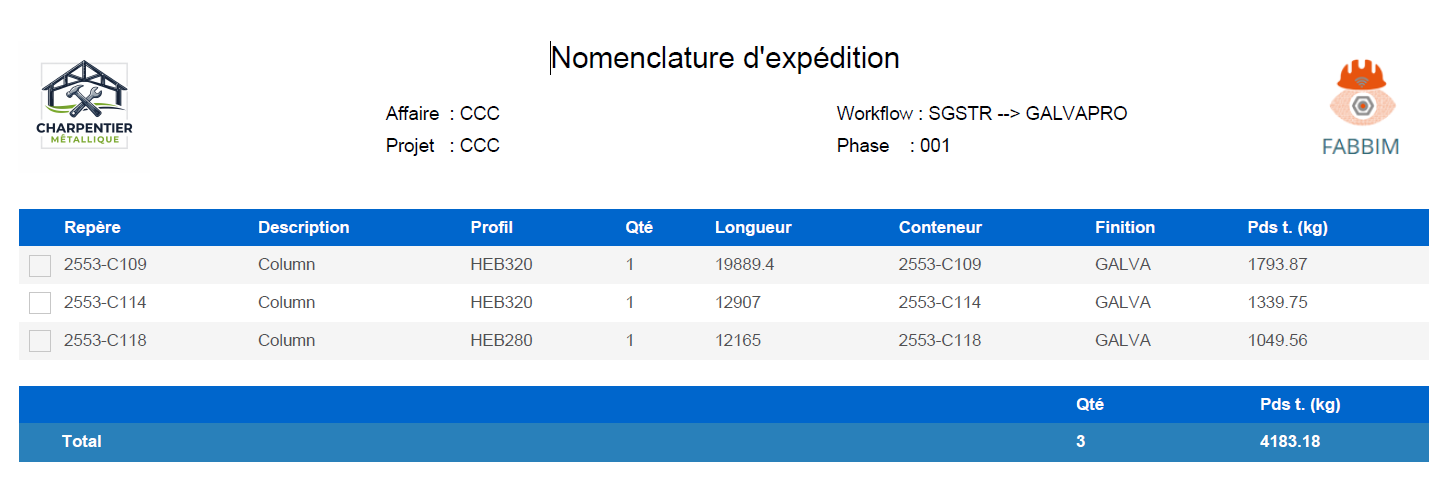
Check marks and quantities before starting to load.
- View the dispatch list : it includes marks, sections, quantities, lengths, finishes and weights.
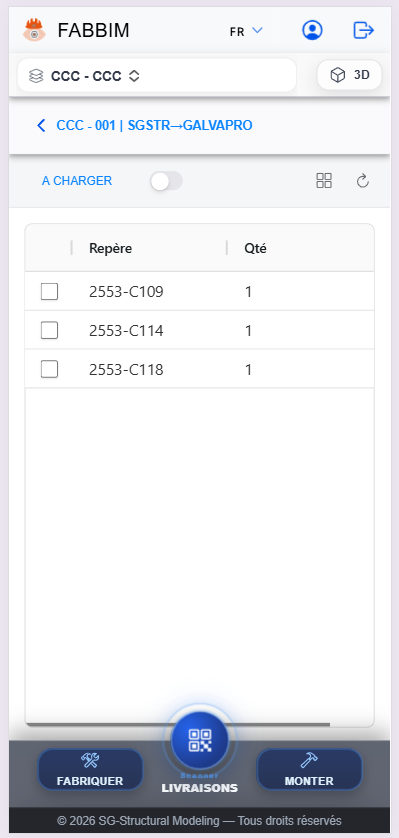
- Open the package using LOAD to access the list To load.
- Check the displayed marks and quantities, then prepare the corresponding parts.
View package assemblies in 3D
Visually check the elements included in the load.
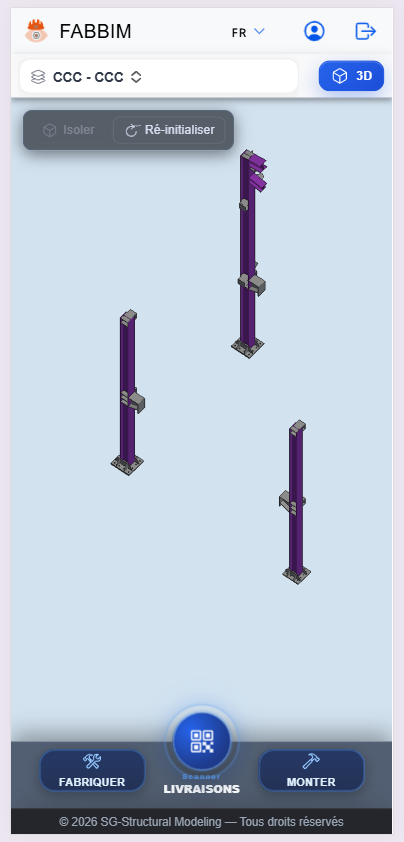
- From the list of parts to load, activate the button 3D.
- Inspect the assemblies shown in the model; the example displays three elements.
- Return to the loading view to identify parts.
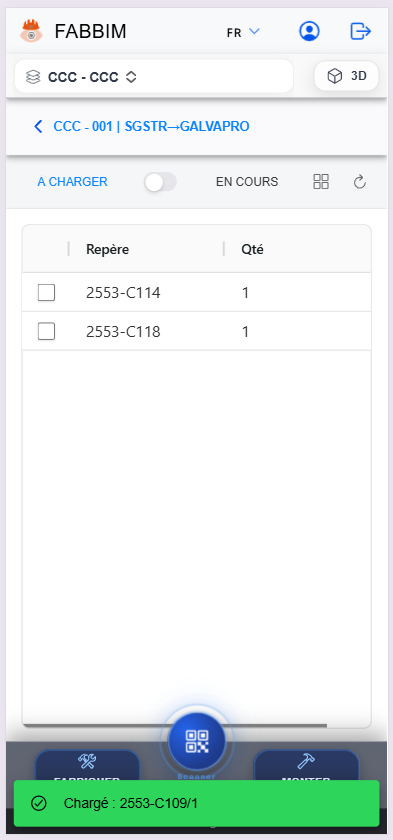
Load parts by scanning or manual confirmation
Record each loaded instance using its label, or use the procedure without scanning.
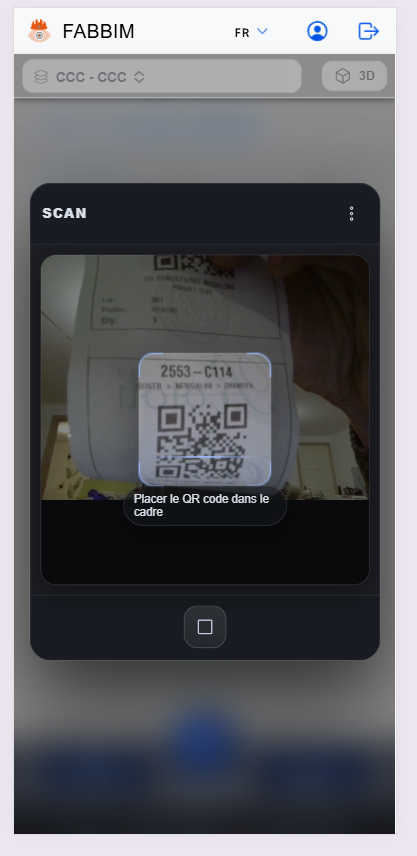
- Open the Deliveries scanner, then place the QR code on the label inside the frame.
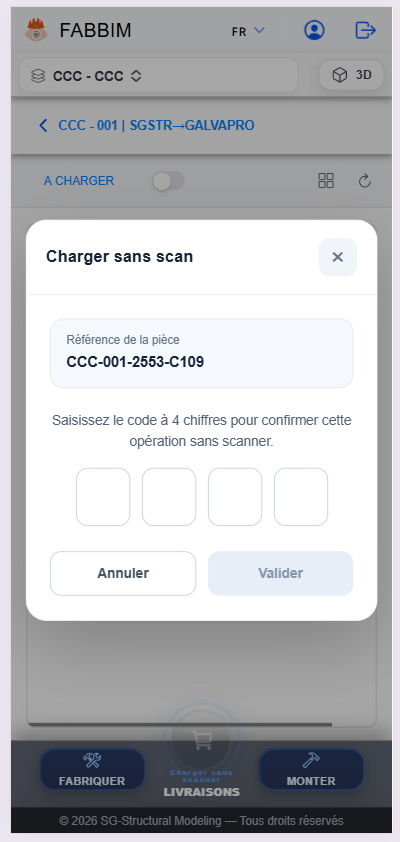
- If you use Load without scanning, enter the four-digit code requested to confirm the operation for the displayed reference.
- After a successful operation, check the green confirmation message and that the instance has been removed from the list To load.
View parts being loaded
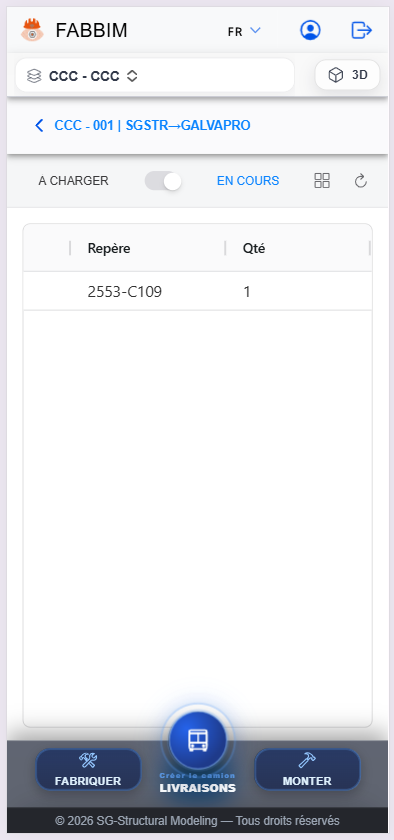
Find the parts already recorded before creating the truck.
- Switch from To load to In progress.
- Check the marks and quantities moved to the list of loaded parts.
- When the load is ready, use the central action Create truck.
Name the truck and check its contents
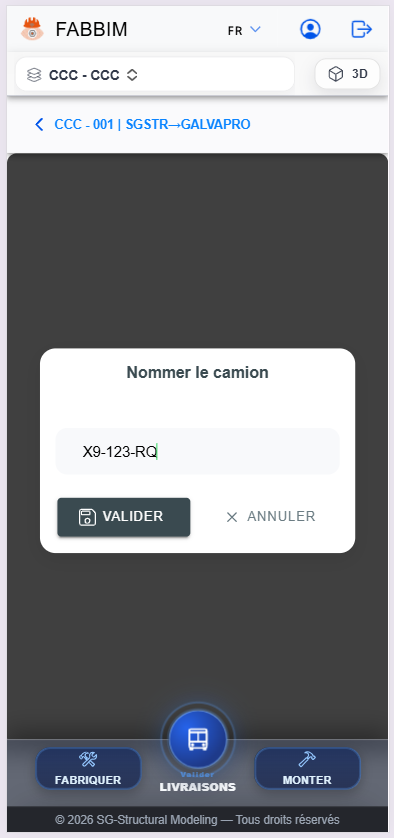
Assign the loaded parts to a truck and prepare to confirm it.
- In the window Name the truck, enter its identifier or registration number, then click CONFIRM.
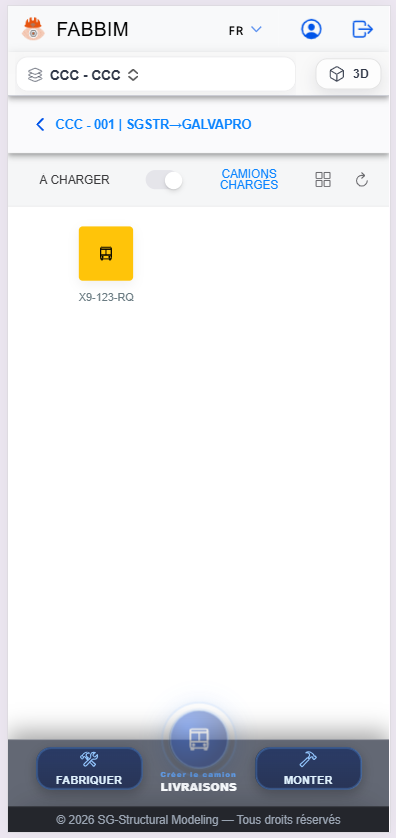
- Find the truck in the view Loaded trucks.
- Open its details to view the package and associated marks. The button Truck departed is available to confirm departure.
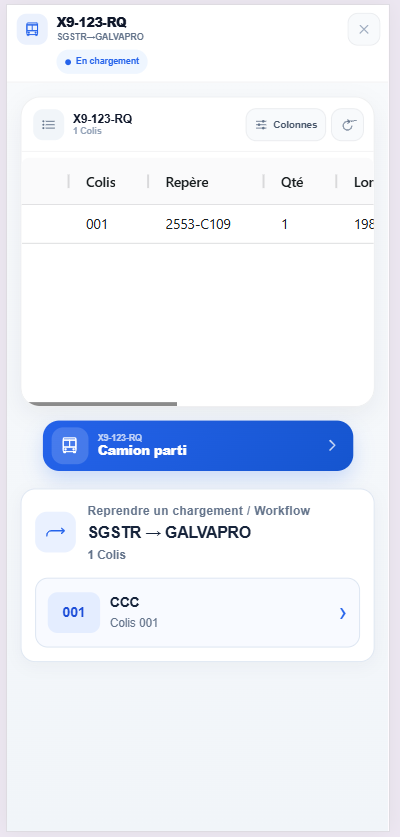
Confirm departure and receive the delivery note
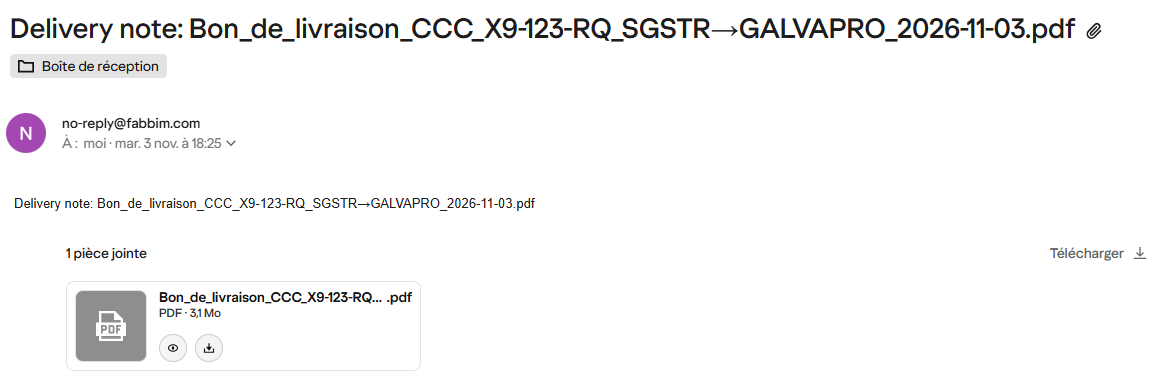
Confirming departure triggers preparation of the delivery note and sends the document by email.
- In the truck details, select Truck departed.
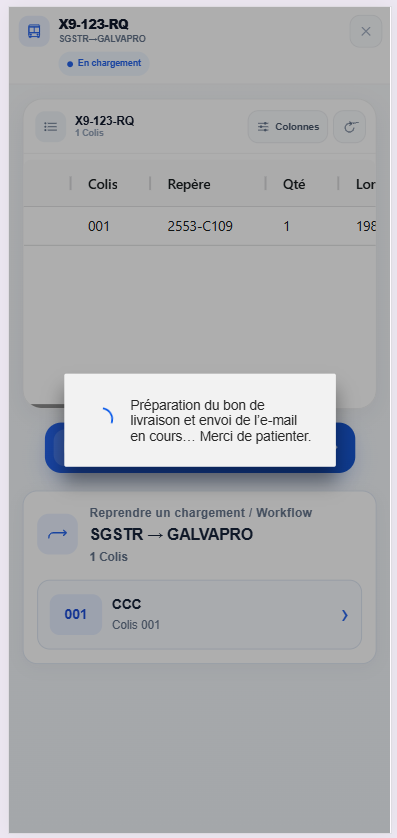
- A message appears while the delivery note is being prepared and the email sent.
- Check the email Delivery note from no-reply@fabbim.com and open or download the attached PDF.
Track the truck in dispatches
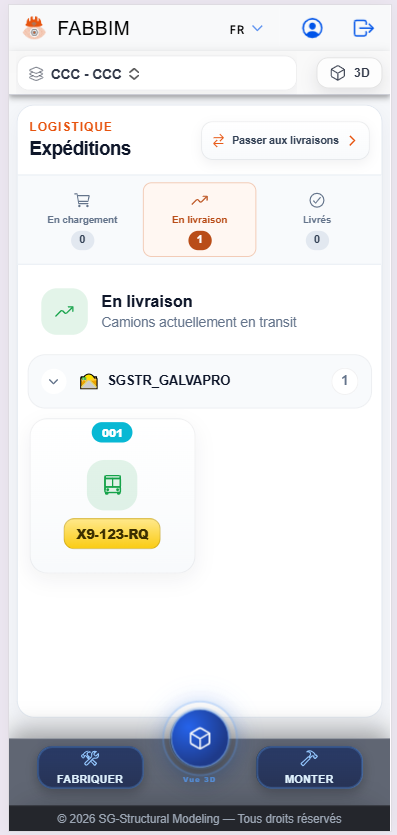
After departure, find the truck in the In transit category.
- Open the section Dispatches or use Go to dispatches.
- Select the stage In transit to see trucks currently in transit.
- Expand the relevant route to find the truck, its identifier and associated package.