Fabbim · User manual · Chapter 03

03. Fabrication tracking

View assemblies and the BIM model, inspect parts and welds, print labels and update fabrication statuses.

CHAPTER 03

Fabrication tracking

From the assembly table to updating each individual instance during fabrication.

Before you start. The project must contain imported assemblies. Select the project, then its package or zone. Available views and changes depend on your access rights.

1. Open fabrication tracking

View assembly progress for a project and package in a single view.

  1. Select the project, then the package / zone using the selectors at the top of the screen.
  2. Open the section Fabrication in the navigation bar.
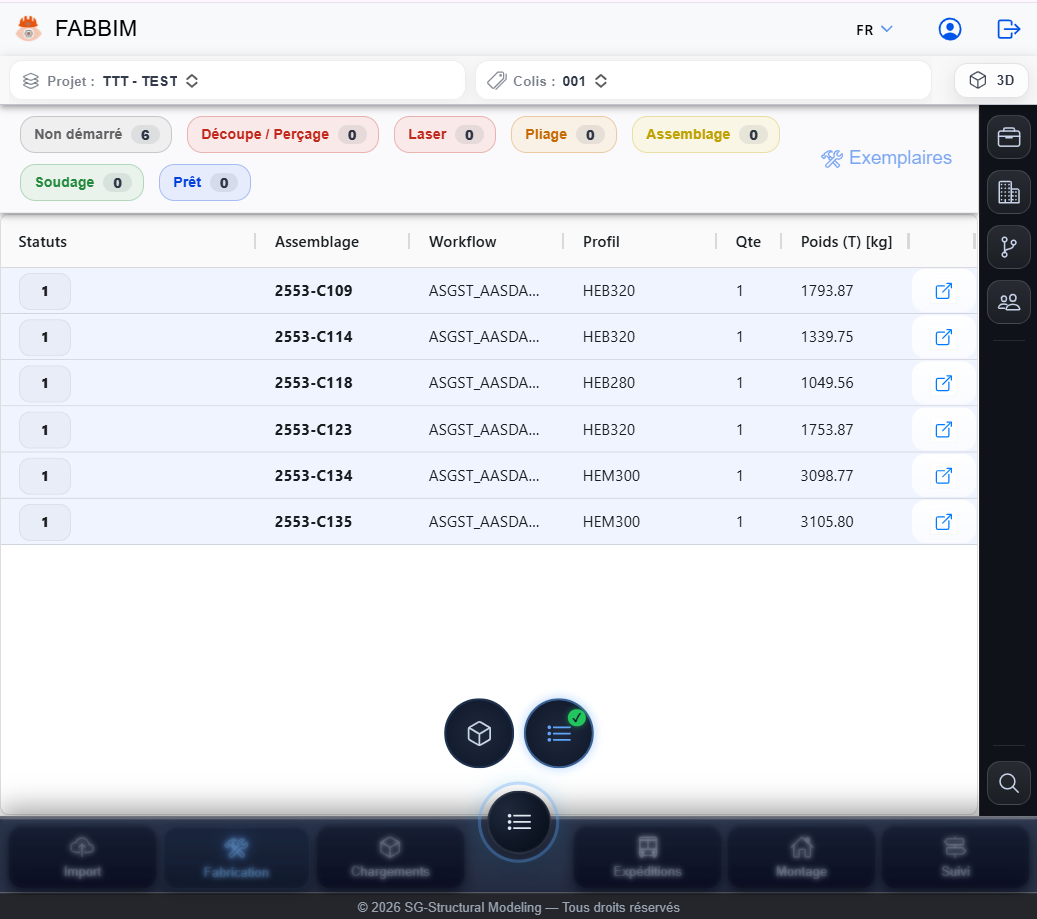
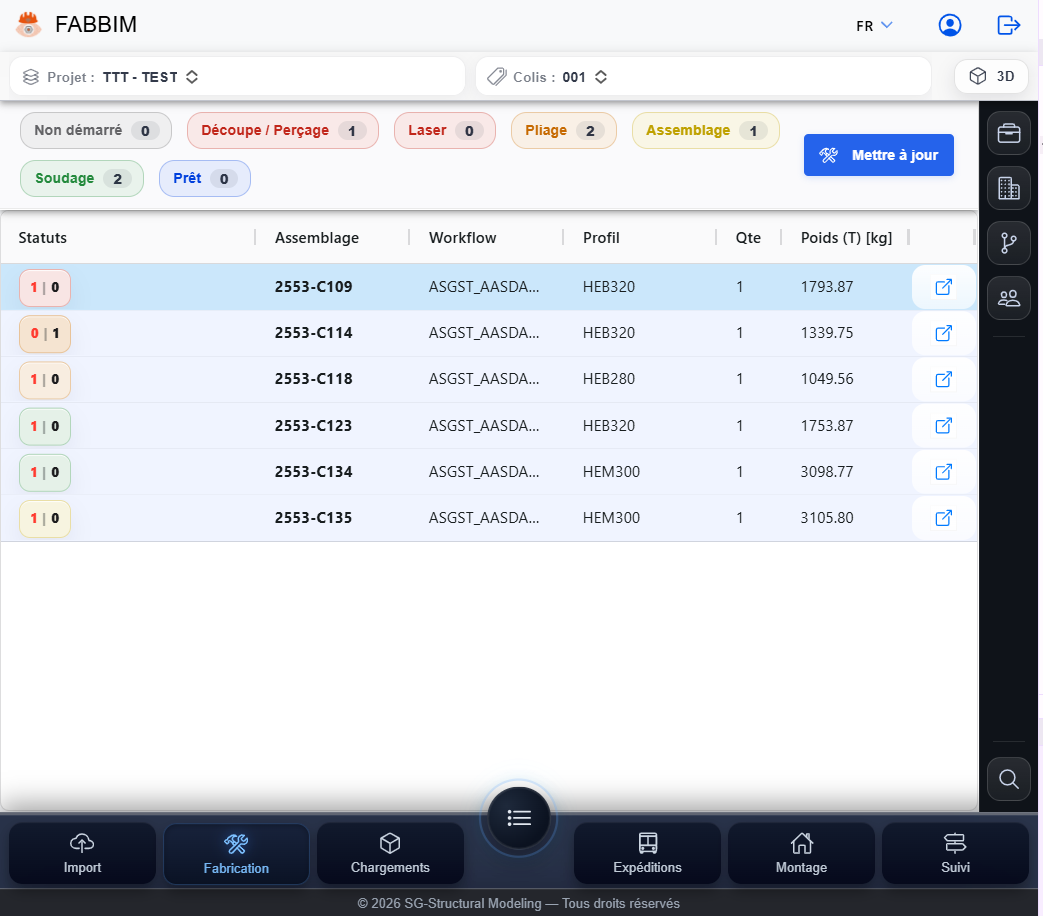
  3. Check the table: each row represents an assembly and includes its mark, workflow, section, quantity and weight.
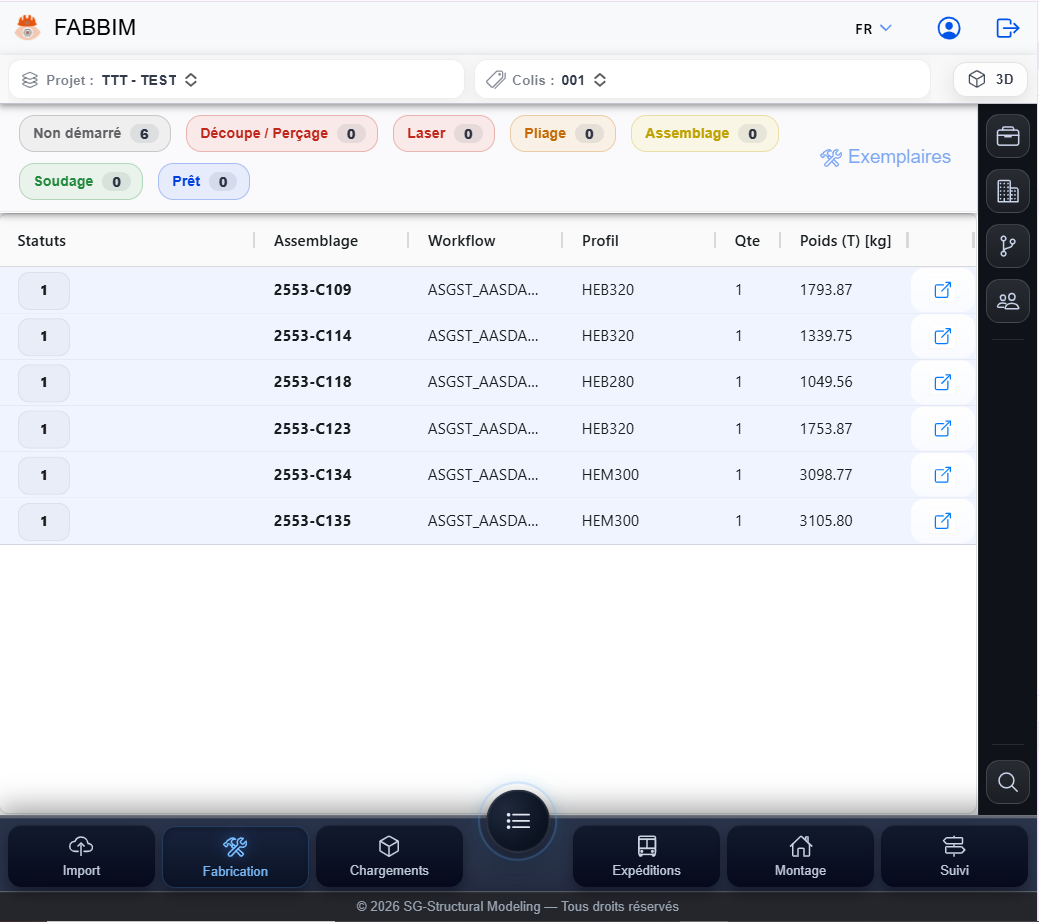
Fabbim fabrication tracking table with assemblies, statuses, quantities and structural steel sections.
Figure 1 — Fabrication overview and status counters.
Good to know. The coloured badges show the different stages: Not started, Cutting / Drilling, Laser, Bending, Assembly, Welding and Ready. They help identify progress and quantities for the current scope.

2. Switch between the table and the 3D model

Work with a list, a 3D view or both views side by side or stacked, depending on the space available.

  1. Activate the button 3D at the top right to display the model.
  2. Use the central view selector to switch between the table, model and combined view.
  3. Zoom, pan and inspect elements in the 3D view. Return to the list to see all rows.
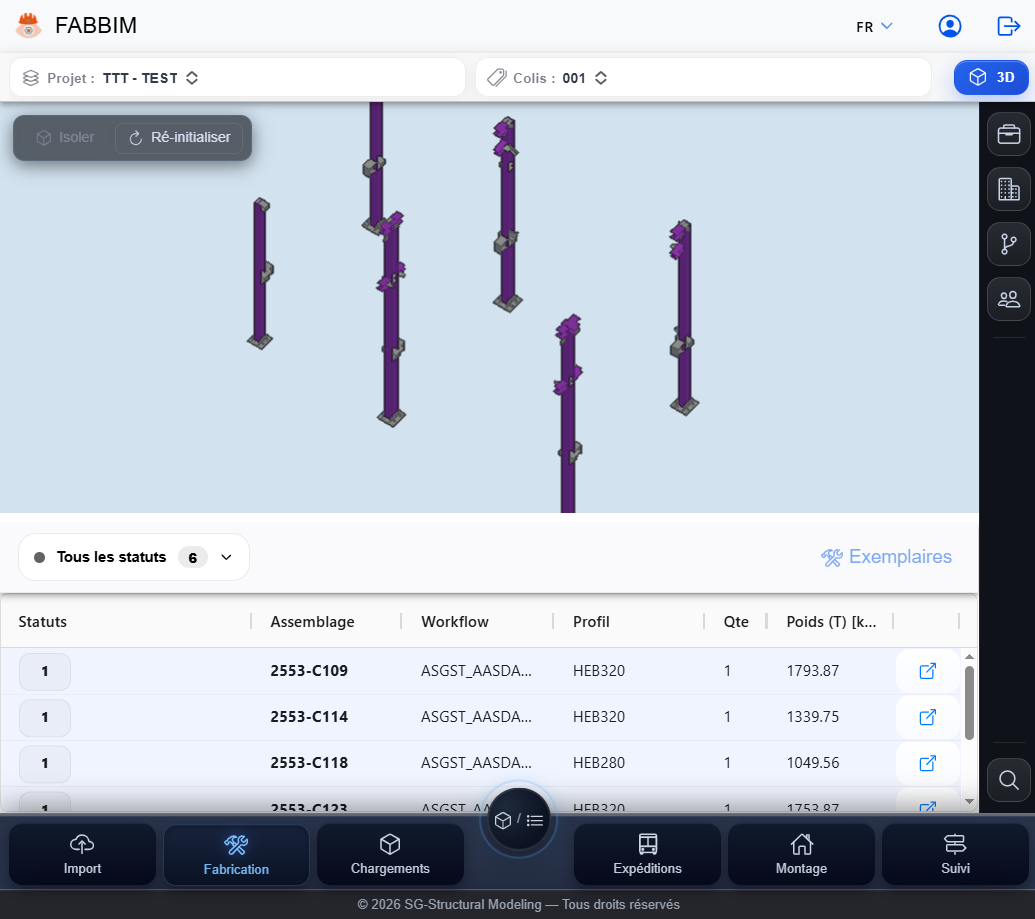
Fabbim combined fabrication view with a 3D BIM model and assembly table.
Figure 2 — Fabrication in combined view.
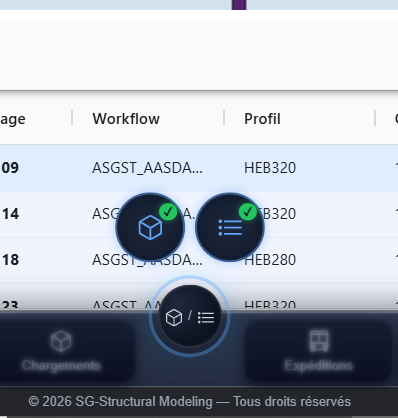
Fabbim display controls for switching between the fabrication table and 3D model.
Figure 3 — Layout control.
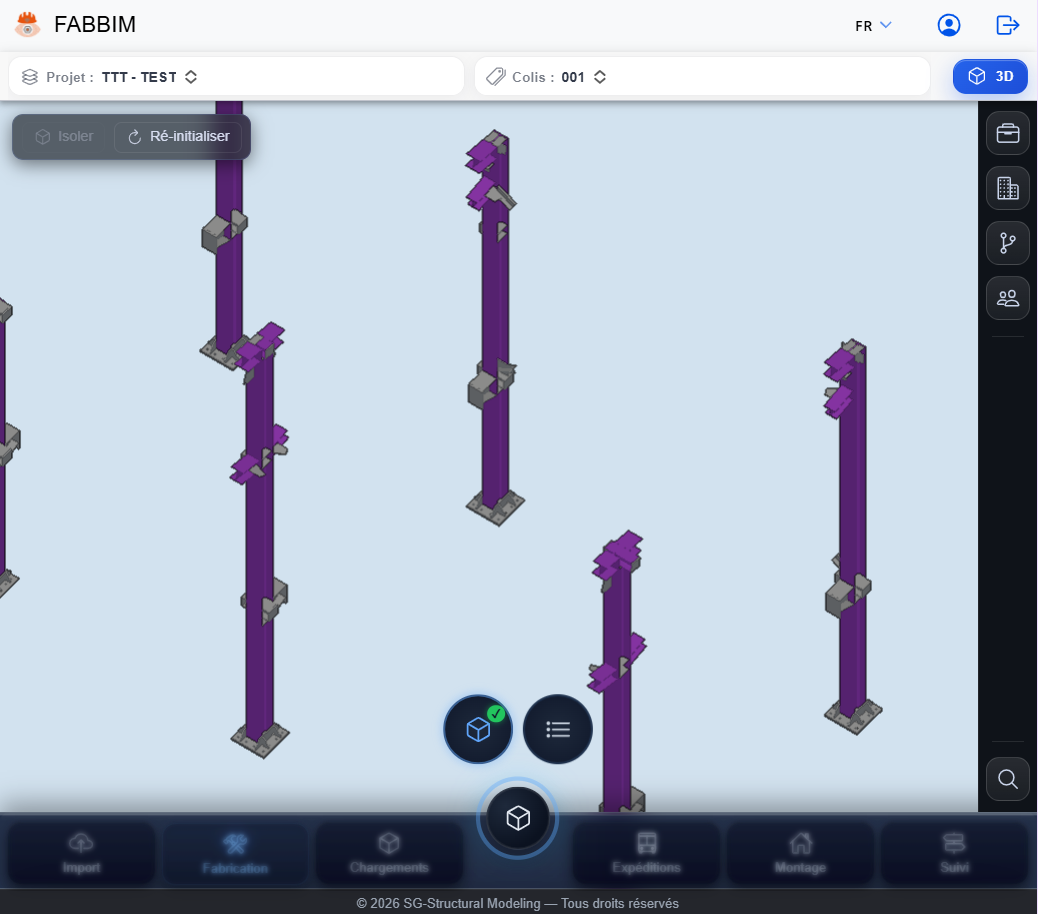
3D BIM view of structural steel assemblies in Fabbim.
Figure 4 — Enlarged 3D view.
Full assembly table and fabrication stages in Fabbim.
Figure 5 — Back to the table.
Tip. The combined view lets you visually match an assembly to its fabrication row without leaving the section.

3. View an assembly's details

Each assembly can be inspected individually before updating fabrication progress.

  1. In the table, click theopen icon at the far right of the relevant row.
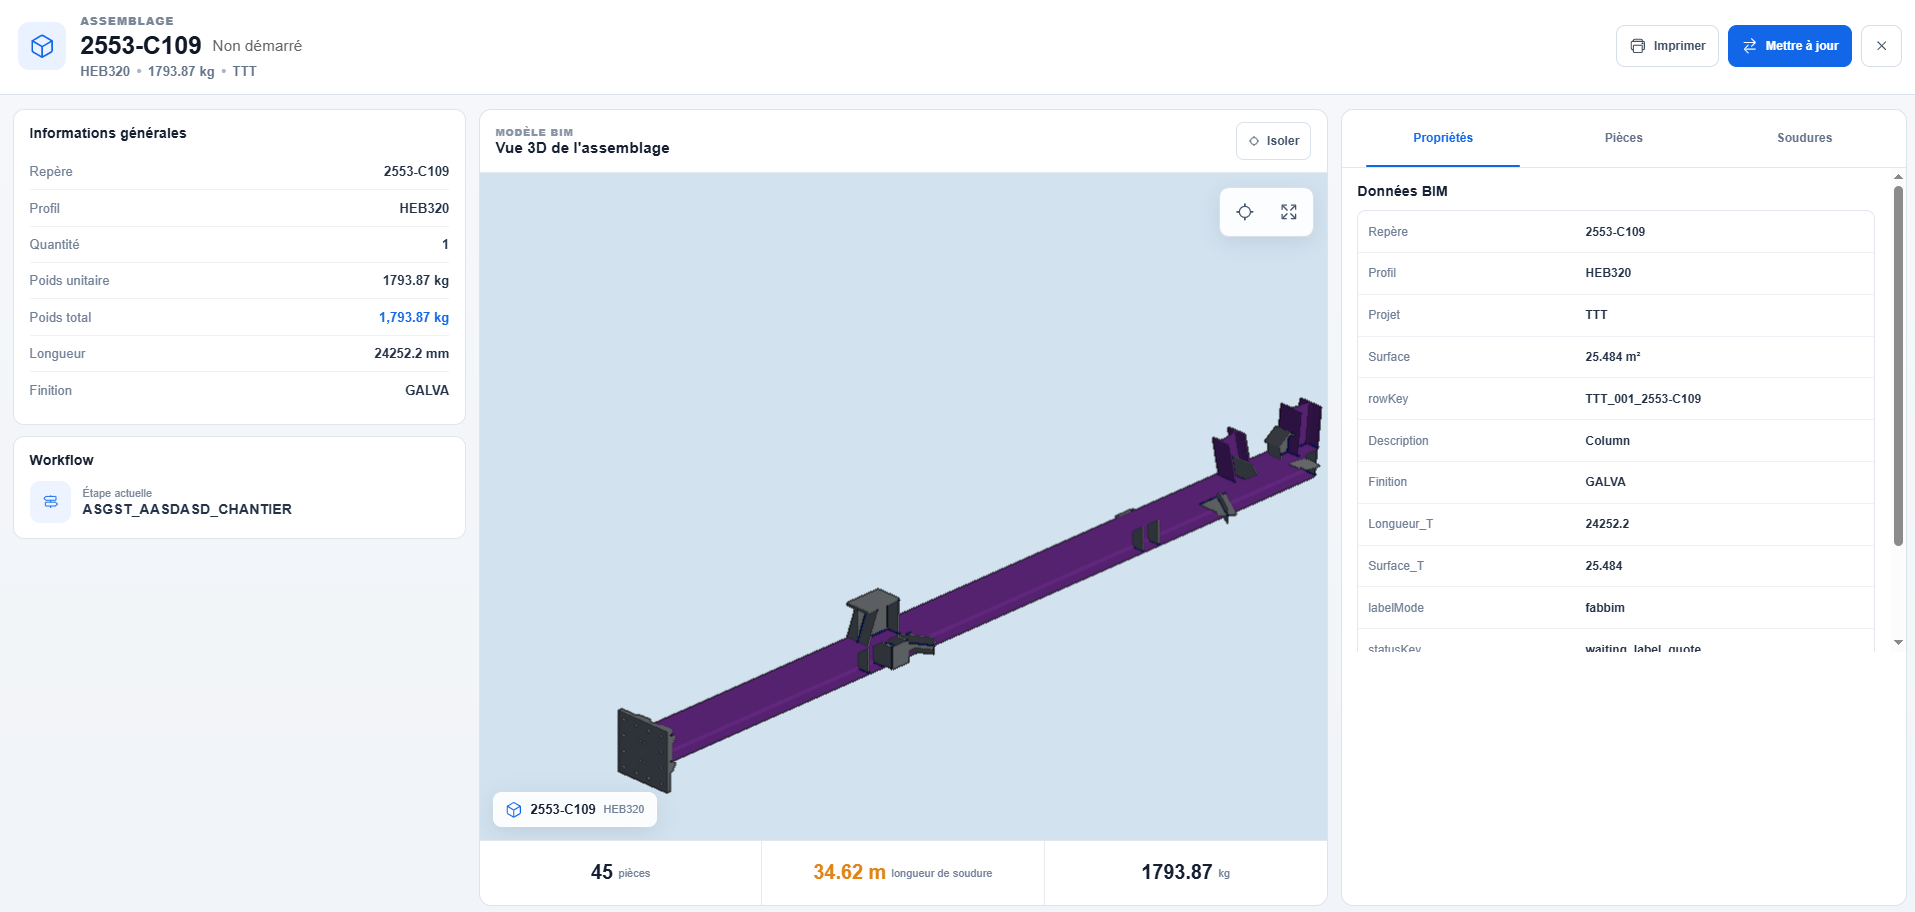
  2. The details show the mark, status, section, quantity, weights, general information and workflow.
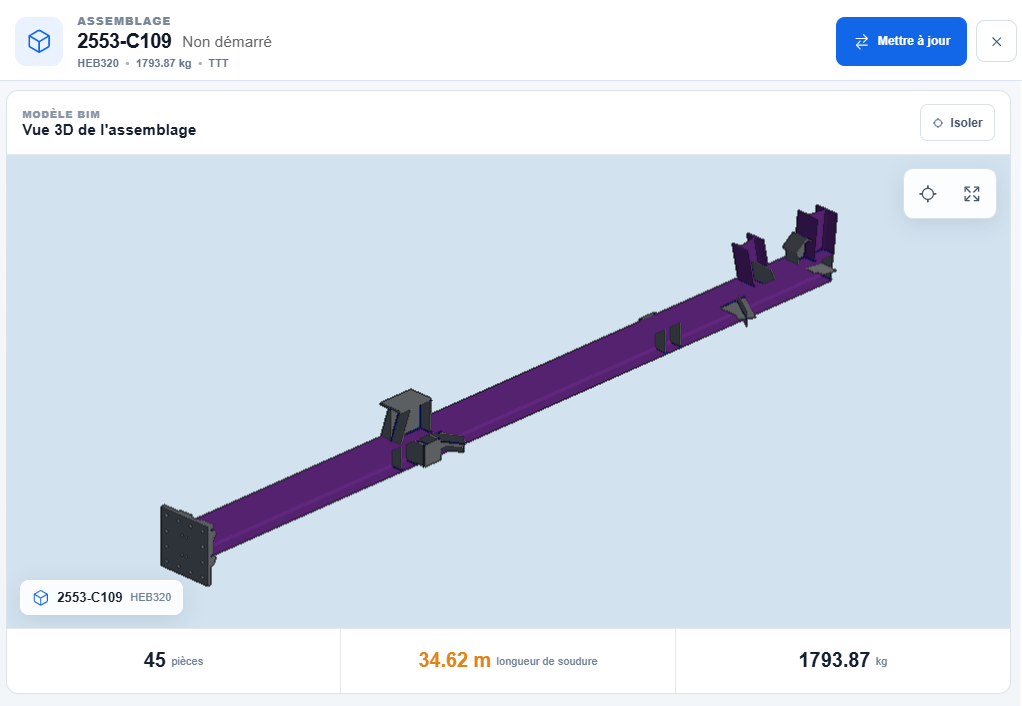
  3. Inspect the assembly in its dedicated 3D view. The lower bar may show the number of parts, weld length and weight.
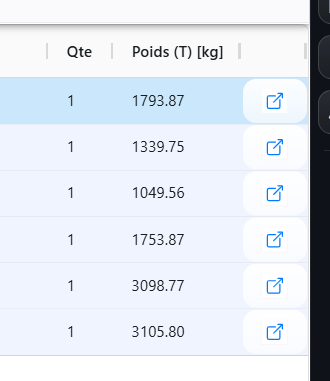
Opening detailed assembly information from the Fabbim fabrication table.
Figure 6 — The icon at the end of the row opens assembly details.
Steel assembly details with a 3D view and update action in Fabbim.
Figure 7 — The details page lets you inspect the assembly in 3D.
Fabbim assembly BIM details with properties, parts list and welds.
Figure 8 — General information on the left, 3D model in the centre and BIM data on the right.
Note. The figures in the screenshots are from a demonstration project. They vary with the imported model.

4. Inspect parts and welds

The detailed view provides more information about the elements that make up the assembly.

  1. In the tab Parts, browse the elements and their properties.
  2. Select a part: it is highlighted in the 3D model, making it easier to identify.
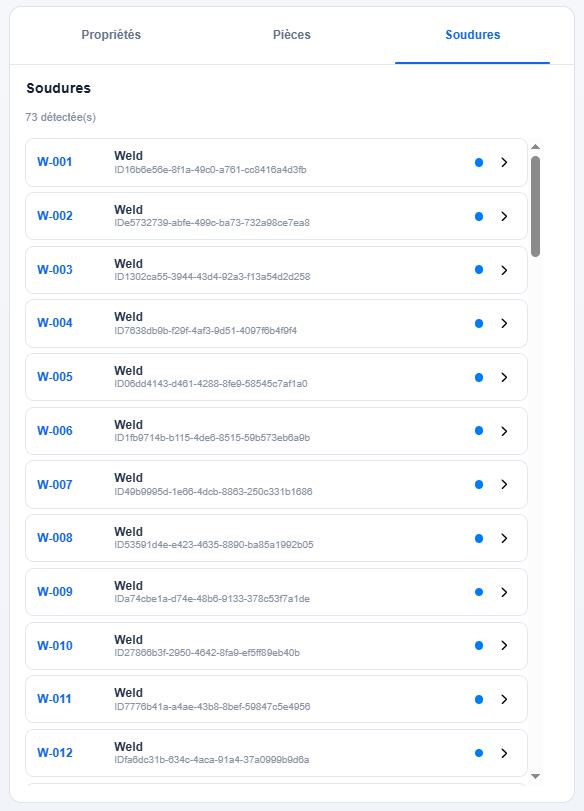
  3. Open the tab Welds to display the welds recorded in the available data.
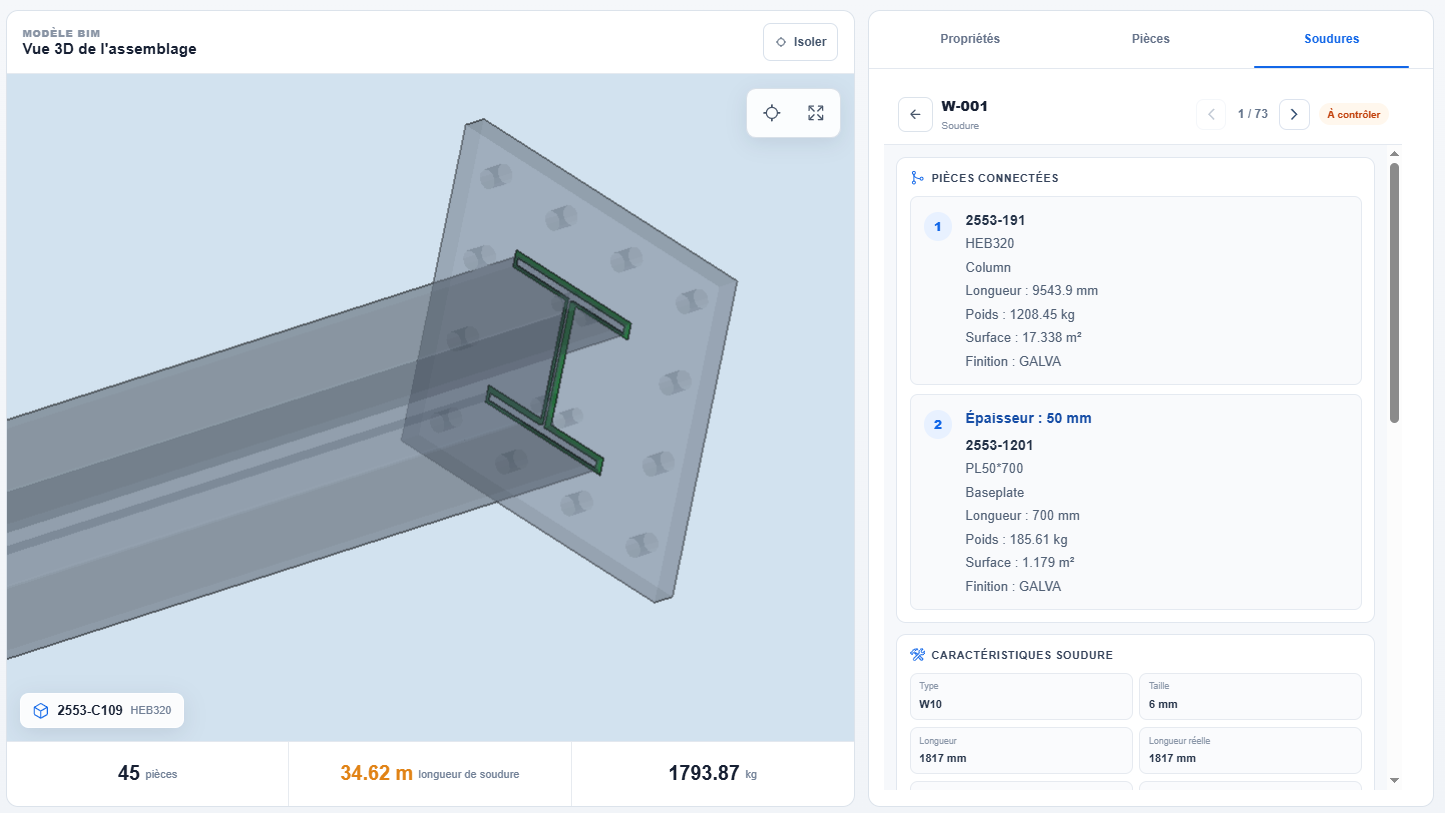
  4. Choose a weld to inspect its location, connected parts and displayed properties.
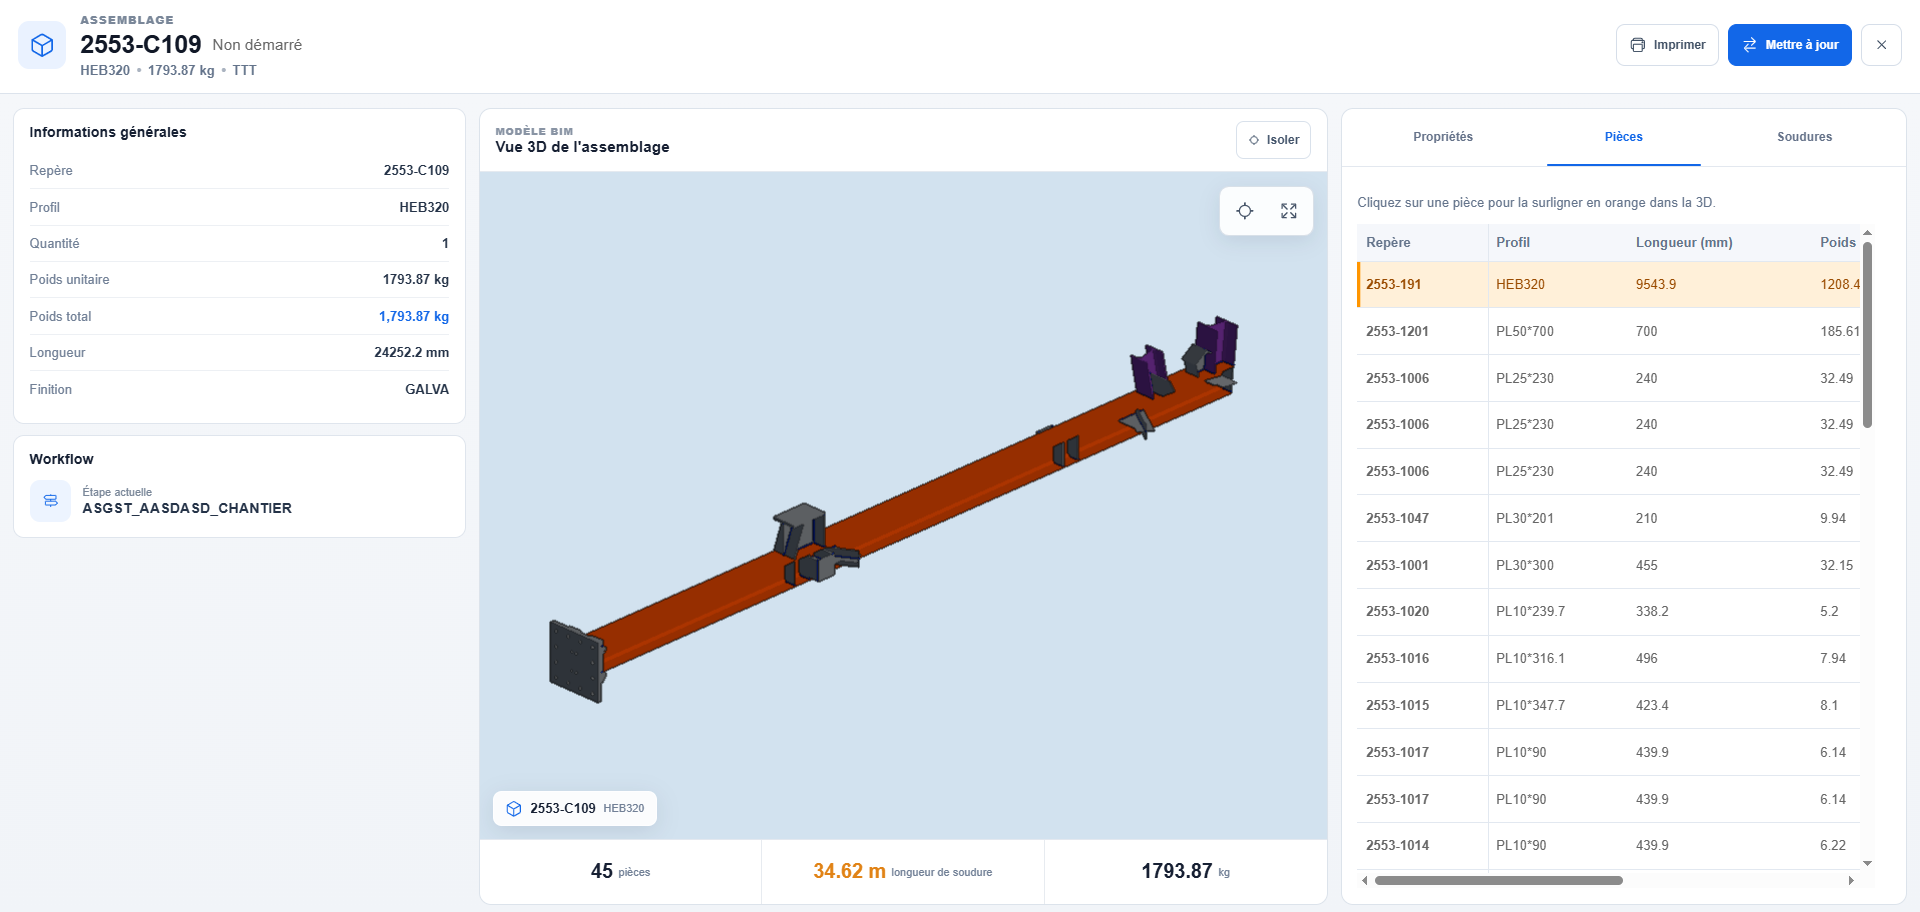
Selecting and highlighting a structural steel part in the Fabbim 3D model.
Figure 9 — A selected part is highlighted in the model.
List of welds in a steel assembly with their marks in Fabbim.
Figure 10 — Viewing welds.
Structural steel weld details and identification of connected parts in Fabbim.
Figure 11 — Weld details.
Caution. Weld and part information depends on the data actually present in the imported BIM model.

5. Print an identification label

Access the print command from the assembly details.

  1. Click Print in the details header.
  2. In the Zebra printing window, choose Connect & Print if a compatible printer is available.
  3. You can also click Download ZPL file to download the printing instructions.
  4. Check the connection status and the messages displayed in the window.
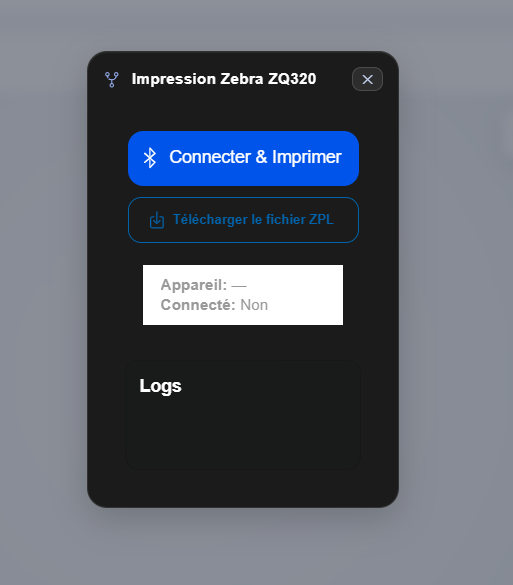
Printing a Fabbim traceability label with a Zebra printer and downloading the ZPL file.
Figure 12 — Zebra printing window: connection, direct printing and ZPL file.
Check before printing. The printer must be configured and accessible from the device in use. The screenshot shows a Zebra ZQ320.

6. Update an individual instance's progress

Fabbim lets you act on identified assembly instances without having to change every element with the same mark.

  1. Open the assembly details, then click Update.
  2. In the window Instances to fabricate, select thestage concerned, for example Cutting / Drilling.
  3. Choose theaction you want. The screenshot shows Start stage.
  4. Enter the quantity to process, then select the instances concerned. The link Select all can be used if needed.
  5. Check the summary in the confirmation button and confirm the operation.
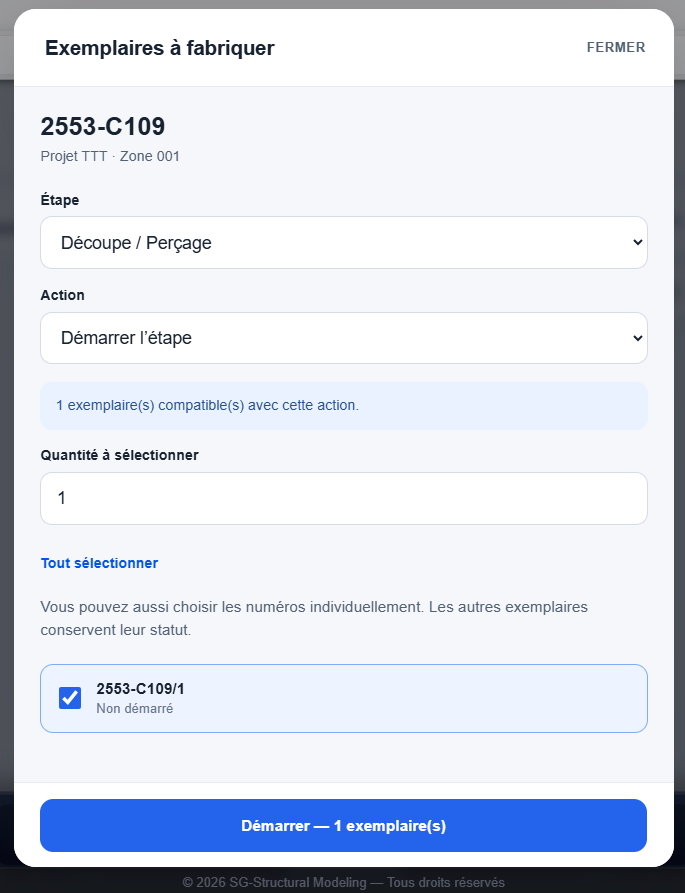
Updating the fabrication status of assembly instances by selecting the stage and quantity in Fabbim.
Figure 13 — Example: starting Cutting / Drilling for instance 2553-C109/1.
Important. The compatibility message indicates how many instances can receive the selected action. Other instances keep their status. Check your selection before confirming.

7. Read fabrication counters and statuses

Updates appear in the list and in the counters associated with each stage.

  1. Return to the Fabrication view after confirmation.
  2. Check the status badges on the rows: their appearance shows the progress of individual instances.
  3. Compare the counters for each stage to quickly identify the fabrication stages of the assemblies.
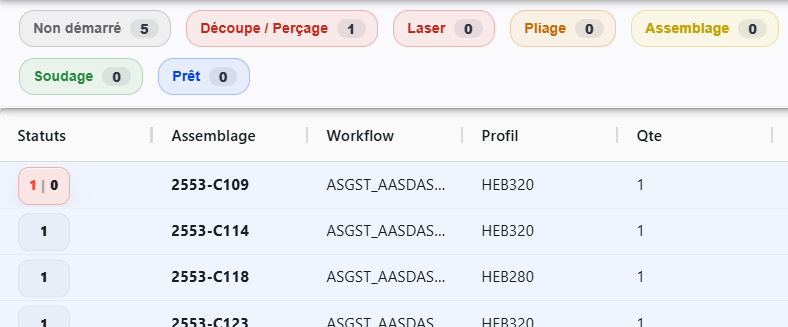
Fabrication stage counters for structural steel assemblies in Fabbim.
Figure 14 — Counters by status.
Tracking assembly progress with coloured statuses in the Fabbim fabrication table.
Figure 15 — View after updates.
Example. The screenshots show assemblies at the Cutting / Drilling, Bending, Assembly and Welding stages. The values shown are not production targets.

8. Filter fabrication by status

Use filters to inspect a specific stage, both in the list and in the 3D view.

  1. In the layout with the model, open the menu All statuses above the table.
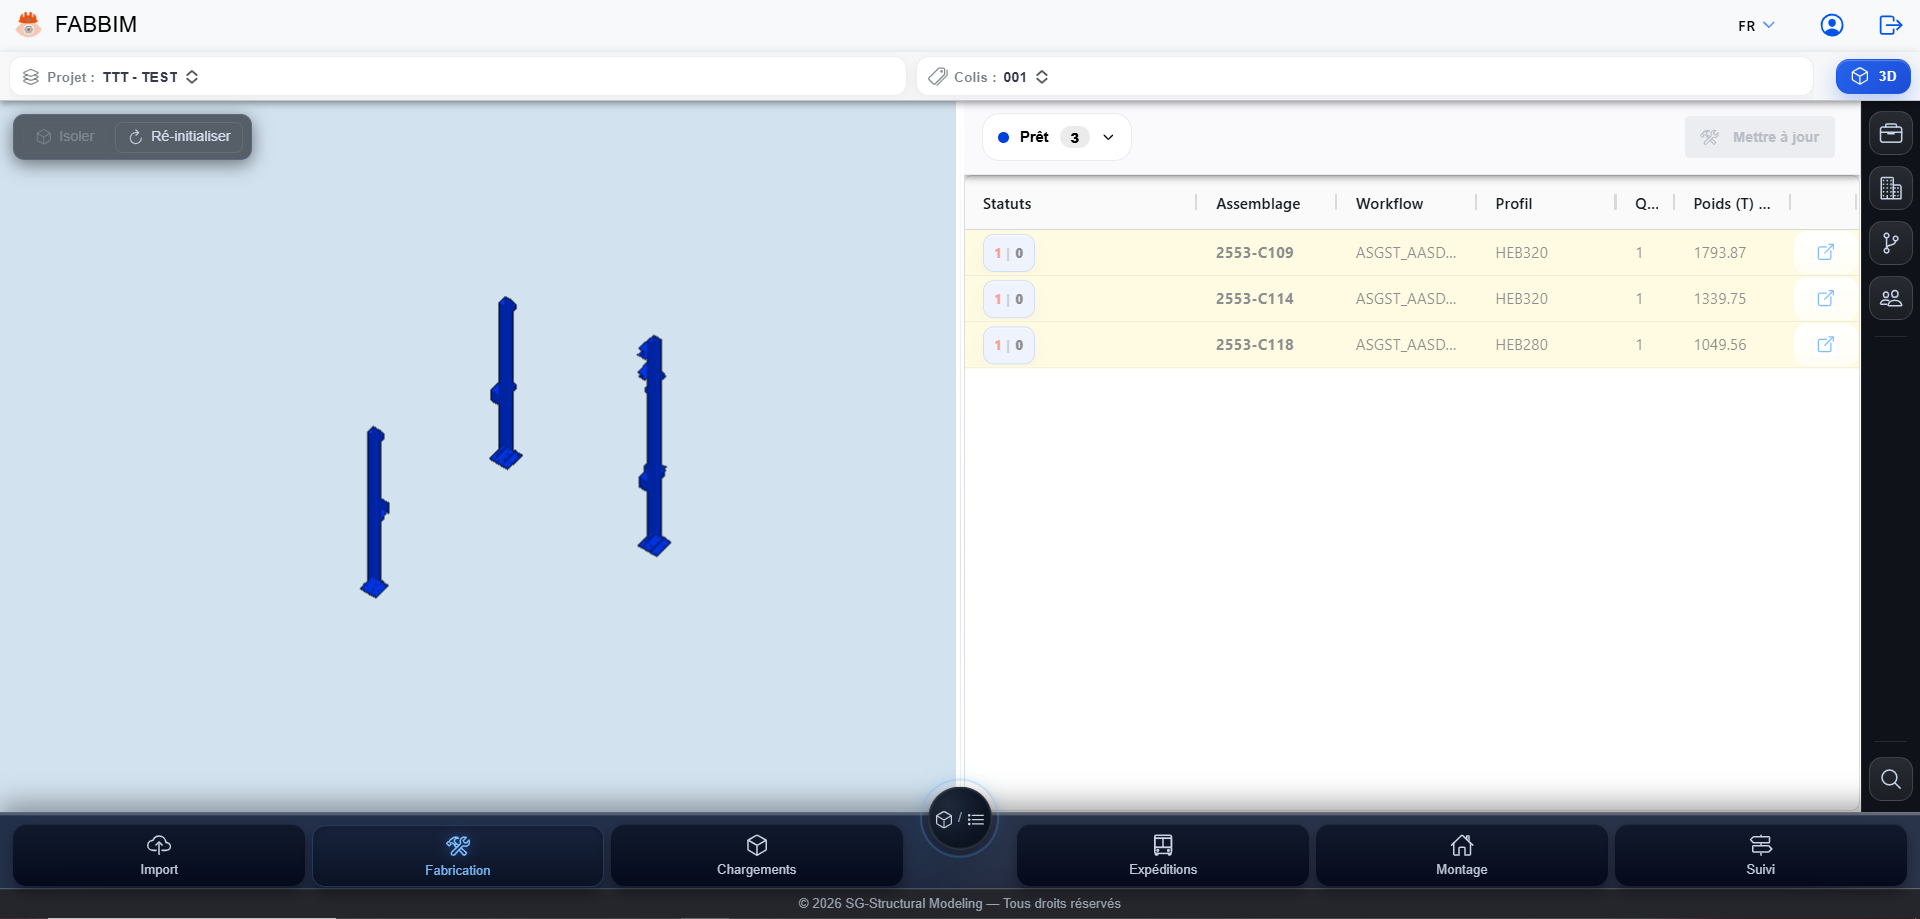
  2. Select the status to view, for example Ready.
  3. The list and model focus on the elements matching the selected filter.
  4. Use Clear filter to show all statuses again.
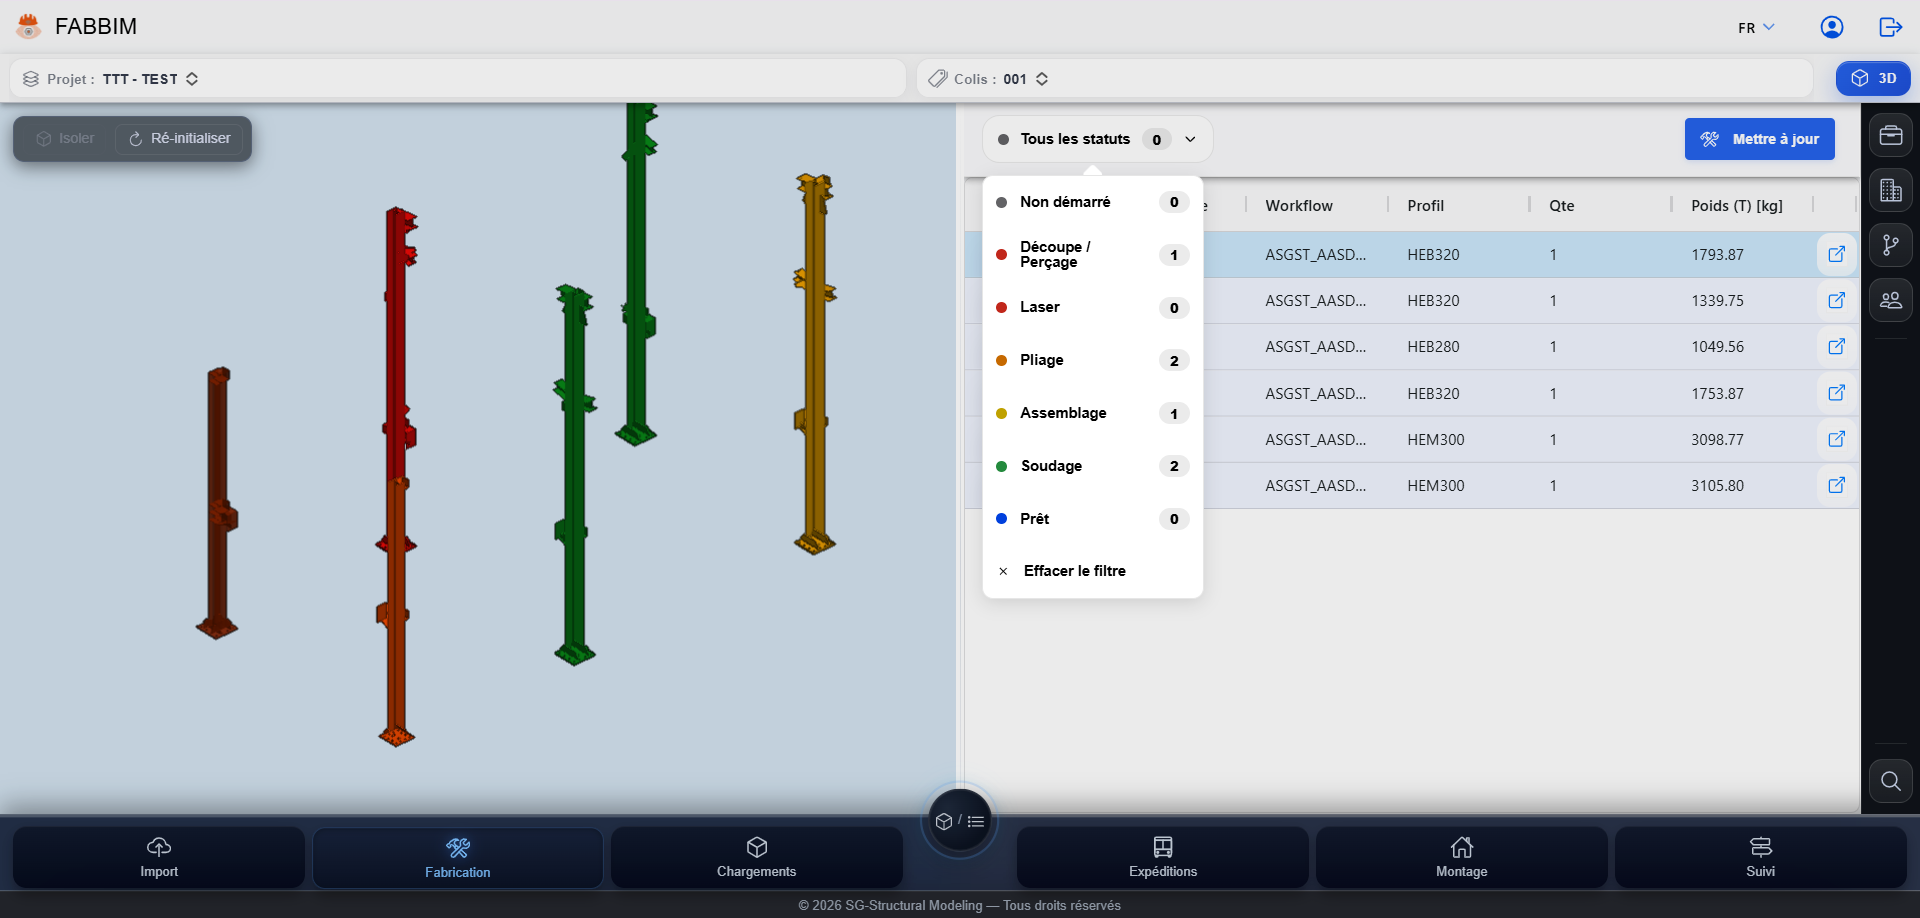
Fabrication status filter in Fabbim for selecting stages and viewing the relevant assemblies.
Figure 16 — The menu lists the stages and their associated counters.
3D BIM view and structural steel assembly table filtered by Ready status in Fabbim.
Figure 17 — View filtered to assemblies with Ready status.
Tip. The filter is particularly useful before preparing loading and dispatch operations.